BLOG

BLOG
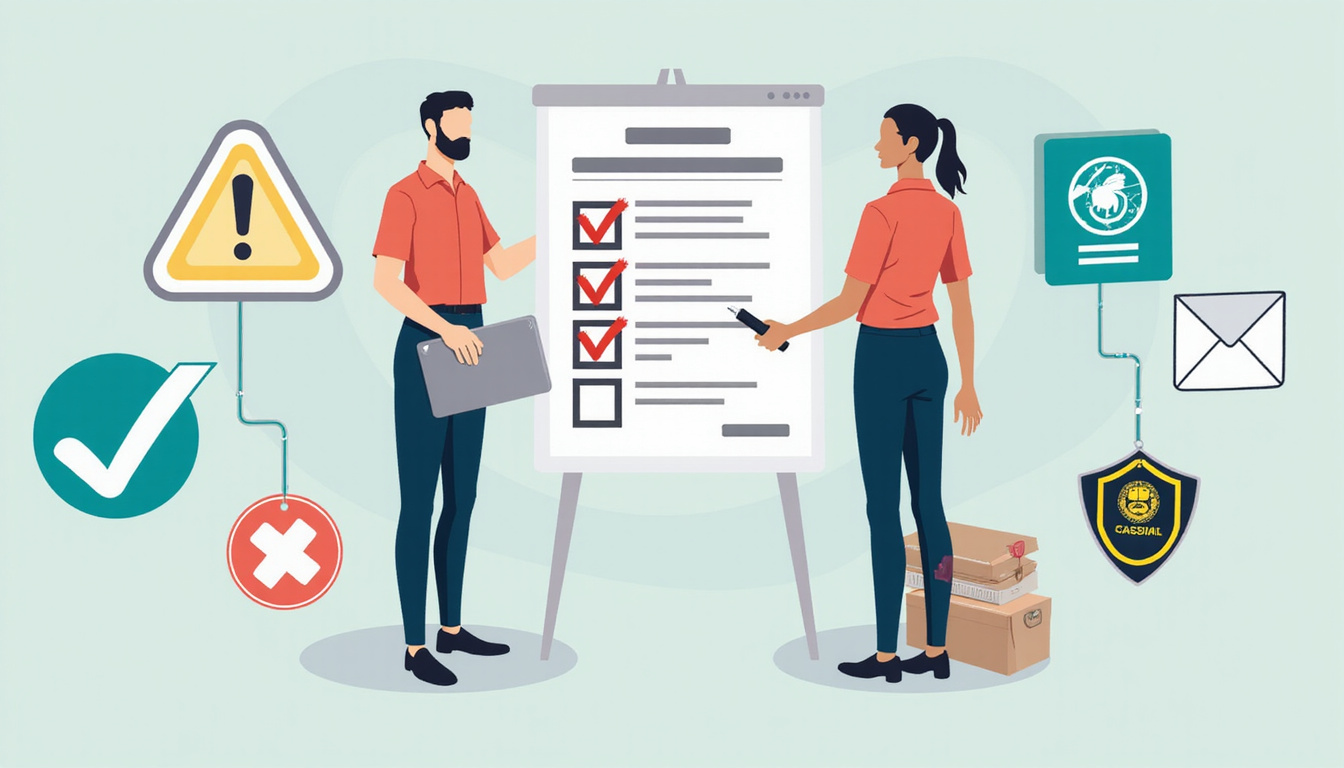
Building a responsible vendor checklist is not an extra luxury. It now is a core part of managing risk, meeting compliance rules, and protecting your brand. Whether you lead procurement, work in compliance, or run a small business, a structured checklist helps you judge suppliers in a clear way. It also helps you show you did your homework and act fast when problems appear.
Below is a framework of 10 straightforward steps. You can adjust these steps for your organization, no matter its size or industry.
Why you need a responsible vendor checklist
Supply chains today face more challenges and are watched more closely than ever. Rules on data privacy, sanctions, ESG (environmental, social, governance), and modern slavery make you answerable for your own work and your suppliers’ actions.
A clear responsible vendor checklist helps you:
• Find high-risk vendors before you sign a contract
• Use the same checks for teams and regions
• Keep records for audits and stakeholders
• Fix problems early instead of scrambling during a crisis
See the checklist as a living tool. It grows with new rules, business plans, and lessons from past vendor work.
Step 1: Define scope and risk levels for your vendor program
Before you use your checklist, decide which vendors need checking and how deep the review should be.
Not all vendors bring the same risk. For example, a payroll processor handling employee data is more risky than a supplier of office plants. Start by:
• Sorting vendors (e.g., IT, logistics, marketing, professional services, manufacturing)
• Setting risk tiers (e.g., low, medium, high, critical)
• Connecting risk to factors like:
– Data sensitivity and access
– Financial exposure
– Operational importance
– Regulatory impact (e.g., health, safety, finance, healthcare)
– Geographic or political risk
This way, your checklist works in layers. High-risk suppliers get a deep check while low-risk ones get a simpler review.
Step 2: Collect core vendor information and documentation
Begin your checklist with basic details. Verify who you are doing business with and gather key documents.
At least, record:
• Legal name and registration details
• Ownership structure and main shareholders
• Tax ID and certificates of registration
• Physical address(es) and operating sites
• Website and main contacts
• Any regulatory licenses needed (e.g., for finance, health, logistics)
Ask for support documents like:
• Certificate of incorporation or business registration
• Copies of major licenses or certifications
• Company policies (such as the code of conduct, ethics, anti-bribery, privacy)
Keep this data in one place so that procurement, legal, and compliance teams work with the same facts.
Step 3: Screen for sanctions, watchlists, and adverse media
Next, use your checklist to screen vendors with external risk signs. This step is key for regulated industries and cross-border work.
Include in your checklist:
• Sanctions lists (such as UN, OFAC, EU, UK)
• Checks for Politically Exposed Persons (PEP) when needed
• Media reviews for signs of corruption, fraud, environmental harm, or labor abuses
• Records of law enforcement or regulatory actions
For small groups, you may check manually. Many companies use screening tools or compliance platforms for scale and accuracy. Record the screening results, your decisions, and any steps to fix issues.
For further guidance, consult groups like the Financial Action Task Force (FATF) (source).
Step 4: Assess ethical, labor, and human rights standards
Today, responsible sourcing means making sure your vendors respect human rights and labor rules. This check is a key part of a modern vendor checklist.
See if suppliers:
• Ban forced, bonded, or child labor
• Pay fair wages and keep proper work hours
• Create a safe and healthy work setting
• Support freedom of association and collective bargaining
• Prevent harassment, discrimination, or abuse
• Provide a way for workers to report issues
Ask them for:
• A signed note on their Supplier Code of Conduct
• Copies of social responsibility or human rights policies
• Any social audit results or certifications (e.g., SA8000, SMETA audits)
When needed, visit sites or use qualified third-party auditors, especially in sectors like apparel, agriculture, or mining.
Step 5: Evaluate environmental and sustainability practices
Your checklist should also cover environmental performance, especially if the vendor has large physical operations.
Ask:
• Does the vendor follow local environmental laws and permits?
• Do they monitor key impacts (like emissions, water, waste, hazardous materials)?
• Do they have a formal environmental policy or management system (such as ISO 14001)?
• Are they part of sustainability or decarbonization efforts?
Request documents like:
• Environmental policy statements
• ESG or sustainability reports
• Certificates (like ISO standards or industry-specific labels)
For major impacts, also check lifecycle effects, packaging, and logistics emissions. You may ask if they use a similar checklist to screen their own sub-suppliers.

Step 6: Review information security and data protection controls
When a vendor handles your data, especially sensitive personal or confidential data, check their information security and privacy measures.
Your checklist may ask:
• Does the vendor have a formal security program?
• Are they certified (e.g., ISO 27001, SOC 2) or reviewed by an independent party?
• How do they handle access control, encryption, backups, and incident response?
• Do they notify you promptly after a data breach?
• Are they compliant with privacy rules (e.g., GDPR, CCPA) as needed?
Request:
• Security and privacy policies
• Recent test summaries or audit reports
• Data Processing Agreements (DPAs) for personal data
• Plans for business continuity and disaster recovery
Tailor these checks to the data’s sensitivity and risk.
Step 7: Check financial stability and operational resilience
A vendor may meet many criteria yet still be risky if they have financial or operational problems. Include this check in your vendor checklist.
Consider:
• Credit checks or rating reports
• Financial statements for larger or key vendors
• Revenue spread (to spot overreliance on one client)
• Dependence on one facility, region, or key person
• Plans for supply chain redundancy and scaling with demand
Ask vendors:
• What measures support business continuity?
• How did they cope during recent disruptions (like a pandemic or political events)?
• Do they have backup plans for critical supplies?
These checks help you avoid costly disruptions and choose vendors who can grow with you.
Step 8: Embed compliance into contracts and service-level agreements
A checklist works best when its terms are written into contracts. Your expectations should show in your contracts.
Include:
• A clause to follow all relevant laws and regulations
• A commitment to the Supplier Code of Conduct or similar standards
• Anti-bribery and corruption rules
• Data protection and security requirements
• A right for audits and proof of compliance
• Obligations to report incidents, breaches, or major changes
• Rights to end the contract if non-compliance happens repeatedly
Work with legal teams to update contract templates as you refine your checklist.
Step 9: Establish onboarding, training, and communication processes
A one-time check is not enough. Vendors need clear instructions and assistance to meet your rules. Your checklist should cover ongoing communication.
Practical steps include:
• Onboarding packs that explain:
– Your code of conduct
– Compliance rules
– Reporting and escalation methods
• Regular training, especially for high-risk vendors
• A clear contact point on your team for questions
• A simple way for vendors to report issues
Remember, this is a partnership. The goal is to help vendors work responsibly and meet your needs.
Step 10: Monitor vendor performance and conduct periodic reviews
The last step is to keep an eye on vendor performance. Risks change, and your oversight must change too.
Set up a monitoring system that checks:
-
Performance metrics
– On-time delivery, product quality, and service availability
– Adherence to SLAs and key performance indicators (KPIs)
-
Compliance and risk signs
– New sanctions or adverse media
– Updated certifications and licenses
– Audit findings and fixes
-
Feedback loops
– Input from your teams (project teams, IT, finance)
– Vendor self-assessments at regular intervals
– Site visits or virtual checks for high-risk vendors
-
Review schedule
– Annual or biannual checks for high-risk vendors
– Less frequent reviews for lower-risk suppliers
Write down all reviews to show that your checklist is not just paper but used every day.
Sample responsible vendor checklist (10-step summary)
To put this in practice, you can list your responsible vendor checklist as follows:
- Vendor scope & risk classification
- Core company information & registrations
- Sanctions, watchlist & adverse media screening
- Ethical, labor & human rights compliance
- Environmental & sustainability practices
- Information security & data protection controls
- Financial stability & operational resilience
- Contractual compliance & protective clauses
- Onboarding, communication & training
- Ongoing monitoring & periodic reviews
Each step can have its own set of questions, risk signs, and evidence needs that match your industry and region.
Integrating your checklist into tools and workflows
To keep your checklist useful:
• Digitize it: Use a procurement or GRC platform, or even a well-organized spreadsheet if you are a small team.
• Assign ownership: Let procurement handle screening, compliance check sanctions and ethics, and let IT review data security.
• Set approval thresholds: For higher-risk vendors, require that legal, compliance, or senior managers agree before proceeding.
• Track issues: Note exceptions and follow-up actions so you know how risks are managed.
Automatic reminders for renewals, re-screens, and certificate expiries keep your team ahead of problems.
Common pitfalls to avoid
When you build or update a vendor checklist, beware of these traps:
• A one-size-fits-all check that treats a low-risk office supplier like a cloud service provider.
• Too many bureaucratic steps that slow down important purchases.
• Checklist fatigue, where forms get filled for the sake of it with little review.
• Missing escalation steps when red flags appear, leaving teams unsure if they should stop onboarding.
• Static documents that do not update as rules or business models change.
Use your checklist as a guide to make informed decisions, not just as a box-ticking exercise.
FAQs about responsible vendor checklists
1. What should be included in a responsible vendor checklist template?
A good responsible vendor checklist template covers vendor details, checks against sanctions and adverse media, labor and human rights practices, environmental rules, data protection, financial health, and contract terms. It should also list review times, required documents, and steps for handling risk.
2. How often should I review my responsible vendor checklist and update vendor assessments?
Review your responsible vendor checklist at least once a year or when there are major changes in regulations or your business. High-risk vendors should be reassessed annually (or more frequently), and lower-risk vendors every two or three years or when significant changes occur.
3. How can small businesses implement a simple responsible vendor compliance checklist?
Small businesses can start with a responsible vendor compliance checklist that covers the basics: verify legal registration, check sanctions, confirm key policies (ethics, data protection), do simple financial checks, and include clear contract points. Even a one-page form plus a standard contract addendum can improve vendor management.
A clear and simple responsible vendor checklist shifts supplier compliance from a reactive scramble to a proactive, repeatable process. Begin small, tailor the steps to your risks, and update the checklist as your supply chain and rules evolve.
BLOG
If you host parties, holiday gatherings, or casual meet-ups where alcohol is served, know that social host liability matters. It links your role as a host with a guest’s actions. A guest leaves your event intoxicated, then they hurt themselves or another person, and you may face financial harm. Understand how it works and protect yourself to cut your risk.
Below you find a guide that shows what social host liability is, how it changes by state, real examples, and steps you can take before, during, and after your event.
What Is Social Host Liability?
Social host liability links you—the private host—with legal responsibility when alcohol causes harm. This rule applies to ordinary people rather than businesses. For example:
• Homeowners host a Super Bowl party.
• Parents throw a graduation celebration.
• Friends run a backyard barbecue or holiday open house.
When a guest becomes intoxicated at your event and then drives, assaults someone, or is injured, you may be held liable for damages.
Key points connect directly:
• It applies to non-commercial hosts.
• It matters most when alcohol goes to minors or clearly intoxicated adults.
• It links with accidents, falls, fights, or other alcohol-related incidents.
Social Host Liability vs. Dram Shop Laws
See how social host liability differs from other legal ideas.
Dram Shop Laws (Commercial Liability)
Dram shop laws link liability to businesses that sell or serve alcohol. They cover:
• Bars
• Restaurants
• Nightclubs
• Liquor stores
These laws hold an establishment accountable when it serves an obviously intoxicated patron or a minor and that person later causes injury or damage. Dram shop laws are common and clearly defined (source: NIAAA – Alcohol Policy Information System).
Social Host Laws (Private Individuals)
Social host laws extend a similar responsibility to private hosts. They link your action of serving alcohol in private spaces with legal risk when you:
• Provide alcohol in your home.
• Allow guests to bring and drink alcohol (BYOB).
• Overlook underage drinking.
Here the law links you to liability even when you do not sell alcohol; you only provide or allow its use.
How Social Host Liability Laws Vary by State
Social host liability changes by state. Some states have clear statutes; others rely on court decisions. In some states, the law offers little liability.
These patterns usually occur:
-
Liability for Serving Minors
• States link liability when you give alcohol to underage guests.
• You may be liable if you know that drinking happens, even if you do not hand over the drink.
-
Liability for Serving Obviously Intoxicated Adults
• Some states hold you responsible for serving alcohol to guests who are clearly drunk.
• The key is: Should a reasonable person have seen the intoxication?
-
Criminal vs. Civil Liability
• Criminal penalties link to fines or charges for supplying alcohol to minors.
• Civil liability links to lawsuits for injuries, medical bills, lost wages, or wrongful death.
Because details vary, check your state’s law or talk with a local lawyer if you host big or frequent gatherings.
When Can a Social Host Be Sued?
To know your risk, review when a claim typically starts.
Consider these patterns:
• Drunk Driving After a House Party
A guest, intoxicated at your event, drives and crashes. Injured people may sue you for overserving or negligence.
• Underage Drinking at Home
Teens drink at your home. A crash, fight, or fall follows. Parents or victims may sue you for allowing alcohol on your property.
• Alcohol-Fueled Assaults or Fights
A guest becomes aggressive after drinking and harms another. The injured person may claim you did not intervene correctly.
• Injuries on Your Property
Intoxicated guests fall down stairs or around the pool. In some states, linking intoxication with your service of alcohol can boost your liability.
To succeed in a suit, the claim generally shows:
- You served or allowed alcohol.
- You knew or should have known a guest was underage or intoxicated.
- The intoxication caused the harm.
Who Is Most at Risk Under Social Host Liability?
Any host might face a claim, but risk increases in some situations:
• Parents of Teenagers
Even if you think supervision makes it safe, many states show no mercy to adults who allow underage drinking at home.
• Hosts of Large Gatherings
Big parties, weddings, or reunions increase the odds someone may drink too much and drive or fight.
• Frequent Entertainers
The more you host, the higher your statistical risk—especially if heavy drinking is common at your events.
• Property Owners with Risky Features
Pools, decks, hot tubs, and multi-level homes link to more accidents when alcohol is involved.
Practical Ways to Reduce Your Social Host Liability Risk
You cannot remove all risk. Yet, you can cut it by planning ahead and hosting responsibly.
Before the Event: Plan With Safety in Mind
-
Know Your State’s Laws
• Look up the local rules on social host and underage drinking laws.
• Understand if your state links alcohol service to civil liability when minors or intoxicated adults are involved.
-
Consider Insurance Coverage
• Homeowners or renters insurance often links to liability coverage should you face a claim.
• Some policies include a “host liquor liability” endorsement. Ask your agent if you plan to host large parties.
• Check that your limits cover high medical costs and lawsuits.
-
Set Clear Ground Rules
• Tell guests that minors should not drink before the event.
• Let adult guests know that rideshare, designated drivers, or overnight options exist and are encouraged.
-
Think About an Alcohol Plan
• Plan to offer food and non-alcoholic drinks.
• Decide ahead of time when you will stop serving alcohol. Do not leave that open-ended.
During the Event: Host Actively, Not Passively
Your role is to guide the event and cut risk by watching your guests.
Key practices link together:
• Serve Food Generously
Food slows absorption and lessens extreme intoxication. Offer full meals like sandwiches, pizza, or protein-rich appetizers rather than just chips.
• Provide Plenty of Non-Alcoholic Options
Water, soda, mocktails, or iced tea link as attractive alternatives. This makes alcohol less the only choice.
• Control the Alcohol Supply
Avoid open bars where guests pour their own strong drinks. Instead, have one responsible adult serve and monitor consumption.
• Watch for Signs of Intoxication
Look for slurred speech, unsteady steps, loud or aggressive behavior, and confusion.
When a guest shows signs, stop serving them and help switch their drink to water, food, or coffee.
• Handle Underage Guests Carefully
Do not serve alcohol to minors.
Do not allow them to drink alcohol they bring or get from others.
When teens are present, stick close by and limit their access to drinks.
• Encourage Safe Transportation
Have a safe plan:
- Offer calls for rideshare or taxi.
- Put a designated driver system in place.
- Allow impaired guests to stay overnight.
Intervene if a guest plans to drive while impaired.
After the Event: Follow Through on Safety
Your duty carries on as your guests leave.
• Double-Check High-Risk Guests
If someone was very drunk, check that they are not driving. Help arrange a ride or a place to stay.
• Manage Clean-Up Carefully
Remove unfinished drinks quickly. This is extra important if minors or unexpected guests stay nearby.
Secure leftover alcohol to cut unsupervised access.
• Document Major Incidents
If a fight, injury, or serious intoxication happened, write down the details with time and date.
Take photos of any property damage.
If injuries are severe or you see criminal behavior, call the authorities.
This record links to your defense if legal issues arise.
Special Focus: Social Host Liability and Underage Drinking
When minors join your event, the link to liability grows even tighter.
Why Serving Minors Is So Risky
• Many states hold a zero-tolerance view for serving alcohol to anyone under 21.
• Liability attaches even if a minor’s parents have given consent.
• Simply allowing underage drinking at your home can link to penalties.
Consequences fall into these links:
• Fines and criminal charges
• Civil lawsuits for injuries or wrongful death
• Higher insurance costs or cancellation of your coverage
How to Protect Yourself When Teens Are Present
• Make a clear rule that no alcohol is allowed at teen gatherings.
• Stay close at your event. Do not leave teens unsupervised.
• Lock away alcohol safely during teen events.
• If a guest appears intoxicated, call their parents and do not let them go unsupervised.
Even if you believe that supervised drinking works best, your state’s rules may work against you. The legal links in these cases can be severe and change lives.
Checklist: Practical Steps to Limit Social Host Liability
Use this checklist as you plan your next event:
- Check your state’s laws on social host liability and underage drinking.
- Confirm your insurance liability coverage.
- Decide in advance:
- What alcohol to serve.
- When to stop serving.
- Who will monitor and serve drinks.
- Offer plenty of food and non-alcoholic drinks.
- Do not serve or allow alcohol to minors.
- Watch for signs of intoxication and cut off service if needed.
- Arrange safe rides or overnight options.
- Secure leftover alcohol and clean up quickly afterward.
When to Talk to a Lawyer About Social Host Liability
You might consult a lawyer if you:
• Host large gatherings often where alcohol is served.
• Plan a high-risk, one-time event like a wedding or graduation party with an open bar.
• Have already faced an incident—such as an accident, injury, or police involvement—after your event.
A local lawyer will explain how social host liability links with your state’s laws, review your situation, and help link you with your insurance if a claim arises.
FAQs About Social Host Liability and Hosting Safely
1. What is social host liability in simple terms?
Social host liability links your role as a private host with legal responsibility. If a guest becomes intoxicated and later causes injury or damage, you may be financially liable. This link holds even if you did not sell alcohol.
2. Can I be held liable if I don’t directly serve the alcohol?
Yes. In some places, the law creates a link between your actions and liability even if you do not hand someone a drink. If you allow open access to alcohol or ignore signs of intoxication, you may still be held responsible.
3. How does social host liability apply when minors are involved?
The law links strict rules when minors drink at your event. Many states impose civil and criminal penalties on adults who provide or allow alcohol to someone under 21. If an underage guest is harmed or harms another, the law may hold you to account, regardless of your intent.
Understanding social host liability does not mean you cannot host a fun event. It simply means you plan ahead, watch alcohol use closely, protect minors, and make safe transportation options clear. By linking these precautions with your event, you can host warmly and reduce legal risks for you and your guests.
BLOG
Introduction: why POS compliance matters now
Retailers hold POS compliance as a top need in 2025. Payment methods evolve, data rules tighten, and regulators punish breaches harshly. A breach can trigger fines, chargebacks, and loss of trust. Retailers must learn clear, practical steps to stop violations.
What “POS compliance” actually covers
POS compliance links technical controls, clear policies, vendor contracts, staff actions, and written records. These links keep your point-of-sale system legal. The rules cover:
- Payment data security (for example, PCI DSS)
- Local consumer rules and tax reports
- Software licensing plus device certification
- Contracts with payment processors and acquirers
Know which layer applies to your store. Encryption, tokenization, refund rules, and receipts all link to avoid fines.
Top risks that lead to retail fines
Retailers see the same risks when regulators or card networks point to errors. These key risks show up as:
- Storing card data without encryption on POS terminals or back-office systems
- Using outdated or unsupported POS software missing key security updates
- Configuring networks poorly so attackers move easily to payment systems
- Poor written records of procedures and incident plans
- Weak oversight of third-party vendors
Each gap can trigger fines and heighten the chance of a costly breach.
Five essential strategies to avoid costly fines
A smart, clear program cuts risk and shows auditors you act in good faith. Use these linked strategies:
-
Harden the POS environment
• Isolate terminals on specific networks; enforce strict firewall rules.
• Disable services and ports you do not need on payment devices.
• Keep terminals and servers up to date with firmware and patches.
-
Encrypt and minimize cardholder data
• Use end-to-end encryption or tokenization so raw card data never stays in your systems.
• Only keep card data when you are legally required and as briefly as possible.
• Enforce strong encryption and clear key practices.
-
Maintain strict access control and logging
• Grant employees only the permissions they must have.
• Require multi-factor authentication for admin accounts.
• Store logs in a tamper-resistant way for audits.
-
Train staff and build clear policies
• Teach role-based training that links card-handling with social engineering risk and quick incident reports.
• Keep clear, updated policies for refunds, voids, and customer data requests.
• Run regular exercises to test your breach response.
-
Vet and manage third parties
• Ask each payment vendor for current PCI DSS (or similar) reports.
• Include contract clauses for fast incident notifications and clear liability.
• Test vendor security practices often.
A simple checklist to get started
Follow this checklist for your next 90 days:
- Segment the POS network and enforce firewall rules.
- Check that encryption/tokenization works with your processor.
- Patch software and verify firmware versions.
- Rotate and secure cryptographic keys; set up MFA for admins.
- Gather vendor compliance reports and update contracts.
Technical controls that make compliance practical
Technical tools link to showing you meet audit demands. Focus on:
- Hardening devices with clear templates for each POS model
- Using secure boot and signed firmware where you can
- Running automated patch updates
- Keeping central logs with tamper-resistant storage and clear retention
- Detecting network intrusions in payment traffic
These tools form the backbone of compliance. Auditors look for clear processes and linked evidence.
Policy, training, and culture: the human side of compliance
Even the best technical setup fails if people lack clear steps. Build a simple compliance manual with clear procedures, incident plans, and step-by-step guides. Train quarterly with short modules—for instance, a 10-minute guide on handling a suspicious card swipe or a phishing test for back-office staff.
Documentation and regular audits
Regulators and payment networks need clear records. Keep evidence that links these items:
- Configuration baselines for POS devices
- Logs of patches and updates
- Access control lists and MFA records
- Proof of staff training and vendor reports
- Timelines for any incident response steps
Run internal audits and simulated tests every six months. If possible, work with a qualified security assessor (QSA) on PCI reviews. This step keeps your work in line with industry needs.
Working with vendors and payment processors
Third-party vendors often link to compliance issues. Manage this link by:
• Requiring current, clear compliance reports from vendors.
• Insisting on contract terms that state who pays fines when breaches occur.
• Choosing vendors that support tokenization and E2EE to cut down your risk.
• Testing vendor setups in a sandbox before production.
If a vendor does not offer clear details, see it as a red flag. Find vendors that link clearly to your control needs.
Preparing for a breach or audit
Even the best controls may link to a breach. Have a clear, tested incident plan that links:
• Quick containment steps to isolate affected systems
• Notification steps to card networks, regulators, and customers
• Forensic plans that gather evidence for auditors
• Communication templates for both internal and public messages
A fast, open, and documented response can cut penalties. Slow or secretive responses link to higher fines and more harm.
Cost vs. consequence: investing wisely
Some retailers see compliance spending as a burden. The right view sees it as risk management. The cost of encryption, training, and audits links to much less expense than fines or lost trust after a breach. Budget for compliance as part of your ongoing operations. Allocate funds for patches, vendor checks, training, and regular reviews.
Measuring success: KPIs for POS compliance
Measure and link these indicators to show progress:
• The percentage of terminals with the latest firmware
• The time it takes to apply essential patches
• The number of failed access attempts and MFA overrides
• How often vendors produce compliance attestations
• The time it takes to detect and contain incidents
These measures help management see clear links between actions and success.
Authoritative guidance and staying current
Follow advice from trusted sources. For payment rules, the PCI Security Standards Council provides clear links between standards and practices. Keep up with vendor alerts and industry updates so you can act and patch fast.
Conclusion: make POS compliance a continuous program
POS compliance is not a one-time list but an ongoing program. Link technology, people, and contracts in a continuous way. Harden devices, encrypt data, control access, train staff, and keep clear records. These clear links help retailers avoid fines and build trust. Start with your 90-day checklist and make compliance a steady goal.
FAQ — quick answers to common questions
Q1: What is POS compliance and why is it important?
A1: POS compliance links security measures, policies, and contracts that keep point-of-sale systems legal. It helps stop fines, reduces breach risks, and secures customer data.
Q2: How do I create a POS compliance checklist for my store?
A2: Create a checklist that links network segmentation, encryption/tokenization, patch updates, access controls (including MFA), vendor reports, staff training, and incident plans.
Q3: What are the basic POS compliance requirements small retailers should know?
A3: Small retailers must link steps such as encrypting payment data, using supported software, keeping firmware current, enforcing strict access controls, and getting vendor reports. These steps solve many audit and breach issues.
Further reading
For full standards and guidance on payment security, visit the PCI Security Standards Council website (https://www.pcisecuritystandards.org).
BLOG
If your restaurant depends on delivery and takeout, off-premise training must come first. Clear, off-premise training cuts errors and waste. It boosts delivery profits. It builds guest loyalty. Guests trust a steady, high-quality service.
Why off-premise matters now more than ever
Off-premise sales (delivery, takeout, catering, drive-thru) now grow each day. Guests choose convenience. They interact with your brand outside your dining room. The handoff from order to doorstep becomes key to profits and repeat business. Industry data shows off-premise dining grows. Restaurants must adjust operations and training to win these sales (National Restaurant Association: https://restaurant.org).
A good off-premise program cuts mistakes. It speeds service. It turns first-time delivery guests into repeat customers who value consistency.
Core areas every off-premise training program must cover
- Order handling and POS accuracy
- Packaging and portion control
- Timed production and ticket management
- Food safety for transit
- Driver and handoff protocol (in-house or third-party)
- Communication and guest updates
- Quality checks and final inspection
Below are clear steps for a training program.
Designing an effective off-premise training curriculum
• Identify the guest outcome for each step (for example: “hot entrees in 25 minutes in secure, intact packaging”).
• Break the outcome into clear, observable steps.
• Create quick tools: checklists, photos of correct packing, and portion scales.
• Use short video demos, hands-on practice, shadow shifts, and written SOPs.
• Check competency with a signed checklist, a quiz, or a live demo before letting staff work alone.
Numbered rollout plan (practical implementation)
- Audit current off-premise operations. Find the five biggest problem points.
- Prioritize modules. Start with order accuracy, packaging, and timing.
- Create or source training materials: 2–4 minute videos, one-page checklists, and sample kits.
- Train a small pilot team. Run a two-week trial while watching key numbers.
- Refine training based on feedback. Then train the full staff with regular refreshers.
- Establish quality checks (final check, driver directions, guest confirmation).
- Repeat audits monthly and after menu or platform changes.
Packaging and portion control — the profit drivers
Packaging does more than show your brand. It keeps food hot, stops spills, and lowers remakes. Teach staff how to pick packaging for each menu item. Guide them on double-bagging soups, adding sauces, and portioning proteins to a standard weight. This stops costly variations.
Include hands-on drills in training so staff can compare correct and incorrect packaging. Use photos or a “gold standard” station as a model.
Order accuracy and tech alignment
Many mistakes begin at order entry. Off-premise training must cover precise POS steps. Teach staff to use modifiers, follow special instructions, and handle third-party orders. They must match ticket items with printed receipts and use the void/correction flow to stop duplicate items.
If you use third-party platforms, train on how orders arrive, what each field means, and how to update ETAs. Train a tech lead to fix platform issues during busy shifts.
Time management and production timing
Off-premise orders need tight timing. Train teams on “cook-to-deliver” timing. Explain the ideal cook window, the staging area for hot orders, and the guideline to avoid starting long-run items too late. Use timer boards or POS estimates to help sequence orders.
Small incentives can boost on-time delivery. Track and display metrics so staff see how their timing drives success.
Driver protocol and guest handoff
The last 50 feet set quality in the guest’s view. If drivers work in-house, train them on clear presentation, safe driving, polite handoffs, cross-sell tips, and basic troubleshooting. For third-party couriers, design packaging and labels so they can deliver efficiently. Use visible order lists, clear bag labels, and tamper-evident seals when needed.
Train staff to verify the address and phone number before dispatch. They must message guests early if delays happen. Good communication stops complaints and chargebacks.
Quality checks and accountability
Every off-premise order needs one final check. Train a “closer” to check temperature, count condiments, verify order contents, and sign off with a timestamp. Use a quick checklist that takes 10–15 seconds.
Create accountability with mystery shopping and random audits. Order from your own menu as a guest to spot issues and find training gaps.
Measuring the ROI of off-premise training
• Order accuracy rate (aim for 98% or more)
• On-time delivery percentage
• Average refund or remake cost per order
• Repeat guest rate for delivery orders
• Average ticket value and any rise after training
Compare results from before and after training. Even a 1–3% drop in remakes or refunds can boost profits for busy off-premise orders.
Quick wins to implement this week
• Create a one-page packing guide with photos for your top 12 items.
• Run a 30-minute roleplay where teammates pack and check each other’s orders.
• Appoint one shift lead as the off-premise quality champion for 30 days.
• Add a “final check” step to the POS workflow before declaring orders ready.
People-first training for guest loyalty
Remember: training is about people. Staff who know why standards exist are less stressed and win more tips. They get fewer angry calls and help drive higher sales. Share customer feedback and good reviews in short huddles.
Encourage cross-training so front-of-house and kitchen staff understand each other’s roles. This empathy makes peak times smoother and eases handoffs.
Leveraging technology in training
Use simple tools to spread training knowledge:
• Host short video snippets on your LMS or cloud drive.
• Put QR codes on packing stations that link to photos and checklists.
• Use brief mobile quizzes to confirm knowledge.
• Use POS reports to feed weekly scorecards.
With these tools, new hires learn faster and standards stay the same across shifts.
Common pitfalls and how to avoid them
• Don’t overload staff with long SOPs. Keep modules short and to the point.
• Don’t train once and then ignore follow-ups. Plan monthly refreshers and coaching.
• Don’t ignore quirks of third-party platforms. Include them in SOPs and test often.
• Don’t skip measurement. Track KPIs to know what needs work.
Case-in-point: a small change that paid off
A small multi-location chain tightened its packaging and added a quick 10-second final check to orders. In six weeks, remakes dropped by 22%. The average ticket rose by 7% thanks to fewer refunds. Staff felt less stress. Drivers got fewer complaints about missing items. Small, clear, off-premise training changes can yield big returns.
FAQ (short) — off-premise training variations
Q: What should an off-premise training program include?
A: It must include order accuracy, clear packaging standards, production timing, food safety measures, driver handoff protocol, and quality checks. Micro-modules and hands-on practice work best.
Q: How can off-premise staff training improve profitability?
A: Good training cuts remakes, refunds, and waste. It shortens delivery times and boosts order accuracy. All of this lowers costs and shields margins while pleasing guests.
Q: What off-premise training strategies help build guest loyalty?
A: Consistent packaging, proactive guest communication, on-time deliveries, and solid quality checks matter. Training staff to solve small issues right away creates trust and turns one-time guests into regulars.
Final checklist to get started (30-day sprint)
• Audit current failures and set training priorities.
• Build three micro-modules: order entry, packaging, and final check.
• Train a pilot team. Run a two-week test while tracking KPIs.
• Adjust SOPs and launch full staff training with regular audits.
Off-premise training is no add-on. It is a key strategy that protects margins and grows guest loyalty. With clear, people-first modules, straightforward processes, and simple measurement, your off-premise channel can drive steady profits and turn one-time delivery guests into lifelong fans.
BLOG
If you own a bar, train your team well. Bar owner training boosts revenue fast. It builds selling skills, sharpens operations, and improves the guest experience. This guide gives field-tested hacks that lift revenue without raising prices.
Why bar owner training moves the needle
Bar owners often lean on marketing and pricing at first. Yet, frontline staff drive growth. Good training lifts the check size, speeds table turns, cuts waste, and builds repeat customers. Staff learn to sell high-margin items, spot upsell chances, and avoid overpour or undercharge errors.
Core revenue pillars every training program must cover
To triple your nightly revenue, attack three fronts. Build your bar owner training around these pillars:
• Sales & suggestive service: Train staff to use upsells and combo offers.
• Operational excellence: Cut cost of goods, quicken service, and reduce shrinkage.
• Experience engineering: Craft memorable moments so guests return and refer.
Insider hack #1 — Train staff to sell without being “salesy”
Selling at a bar must feel natural. Teach these micro-skills with clear links:
• One-question opener: Rather than asking, “What can I get you?” use, “Do you want something refreshing or something strong tonight?” This question guides choices gently.
• Signature-pair suggestions: Each cocktail should list a fitting food. For example, say, “That goes great with our charred wings.”
• Tiered offers: Present a basic, premium, and bartender’s pick option. Customers tend to choose the middle or premium.
• Taste-led upsell: Allow staff to offer a small sample of a house pour or cocktail—for a fee or free—to boost conversion.
Insider hack #2 — Pour control and product knowledge to protect margin
Mistakes in pour size or product use add up fast. Train your team to learn:
• Standard pour drills: Practice measured pours so staff know 1 oz, 1.5 oz, etc. Use jiggers even if you free-pour later.
• Recipe memorization: Staff must know the ingredients and glass types for each menu item. This cuts errors and remakes.
• Cross-utilization training: Show which mixers and garnishes can swap. This avoids waste and speeds service.
Insider hack #3 — Shift-level incentives and gamification
Money talks. A bit of competition works well:
• Nightly team goals: For example, set targets like $X extra on desserts or Y signature cocktails sold. Split a bonus of the extra margin.
• Leaderboards: Use a visible scoreboard to track upsells, covers, or speed. Celebrate wins at shift change.
• Mystery guest audits: Have secret-shop audits for clear feedback. This keeps standards high.
Insider hack #4 — Menu engineering: design for profit, not just looks
A clear menu guides choices. It can raise the average spend:
• Anchor pricing: Place one premium-priced item to make others attractive.
• Limit choices: A lean menu of 8–12 cocktails sells quicker than a bloated one.
• Highlight high-margin items: Use icons or a “House Favorites” box.
• Seasonal features: Use limited-time offers to create urgency and test margins.
Insider hack #5 — Use data and tech to optimize every night
Show staff how data helps in real time. Train them to see that data works for everyone:
• Teach them to read POS reports for busy items, peak hours, and each server’s average check.
• Use reservation and waitlist systems to manage flow and cut walkaways.
• Apply simple inventory tools and include nightly reconciliation in the closing checklist.
Step-by-step implementation plan (execute in 30 days)
- Audit (Days 1–3): Gather 90 days of POS sales, inventory shrink reports, and labor schedules. Find your top 5 selling hours and top 10 menu items.
- Build a 6-week training curriculum (Days 4–7): Create modules for upselling, pour control, menu knowledge, and closing procedures.
- Train core team (Week 2): Hold 3 half-day sessions with key staff and managers. Role-play scenarios and measure pours.
- Launch incentives (Week 3): Set nightly goals and start a leaderboard. Announce bonuses.
- Monitor & adjust (Weeks 4–6): Check key metrics each week. Tweak scripts, menu placements, and shift incentives.
- Scale (After Week 6): Train all staff and lead monthly refreshers.
Quick checklist for your opening training session
• Welcome and revenue goals for the month
• Role-play: 10-minute selling script practice
• Measured pour exercise with timers and jiggers
• Menu walkthrough that spots 5 high-margin items
• POS refresher: modifiers, comps, and quick checks
• Closing checklist and inventory spot-check training
Measure what matters — KPIs to track nightly
Watch these metrics nightly and roll them into weekly reports:
• Average check ($)
• Revenue per seat or cover
• Table turn time (minutes)
• Beverage COGS percentage (improving toward target)
• Shrinkage (inventory variance)
• Attach rate (share of customers ordering a cocktail versus beer/wine)
• Repeat guest rate and loyalty signups
Technology and tools that amplify training
• POS dashboards that send daily sales snapshots to managers.
• Inventory apps that allow mobile counts to shorten closeouts.
• Digital tip pooling and instant payout apps to reward performance fast.
• Training platforms (LMS) so staff can complete short quizzes and video refreshers between shifts.
Case example — How one owner tripled revenue in 90 nights
A bar in a mid-sized city faced issues: a bloated menu, inconsistent pours, and no upsell culture. They launched a 6-week training program focused on suggestive selling, pour control, and nightly incentives. They also simplified the menu to 10 cocktails and added a “late-night premium shot” program.
Results in 90 days:
• Average check up by 28%
• Table turns up by 15% during peak hours
• Beverage COGS improved by 3 percentage points due to pour control
• Overall nightly revenue tripled on targeted nights (events and Fridays) because of better upselling and pace management
This is possible. Many bars work below their potential. Focused training lifts low-hanging fruit.
Designing a repeatable bar owner training curriculum
Week 1 — Foundation: culture, safety, and mission
• Cover house standards, licensing, ID checks, and responsible service
Week 2 — Sales skills and scripts
• Teach openers, upsells, cross-sells, and how to handle objections
Week 3 — Menu mastery and tasting
• Walk through ingredients, garnishes, and pairing logic
Week 4 — Operational discipline
• Practice pour control, speed stations, POS modifiers, and closing audits
Week 5 — Experience design
• Learn crowd flow management, lighting/music cues, and VIP handling
Week 6 — Review and certification
• Use role-plays, a written quiz, and a measured pour test for certification
Three common mistakes in bar owner training (and how to avoid them)
• Mistake: One-off training events.
Fix: Use weekly refreshers and short quizzes.
• Mistake: No measurement.
Fix: Define 3 KPIs before training and update them weekly.
• Mistake: Ignoring manager buy-in.
Fix: Train managers first; they set the tone.
One authoritative resource to guide curriculum design
For stronger operational and workforce guidance, the National Restaurant Association offers practical frameworks and data. Many profitable bars use their insights as a baseline for training programs (National Restaurant Association).
FAQ — Short Q&A using keyword variations
Q: What is bar owner training and why is it important?
A: Bar owner training builds selling skills, operational standards, and guest experience design. It matters because it boosts check size, cuts costs, and draws repeat guests.
Q: How long should a bar owner training program take to show results?
A: Focused training can yield measurable improvements in 4–6 weeks and lift nightly revenue in 60–90 days with proper incentives and menu changes.
Q: Can a bar owner training course really triple nightly revenue?
A: A well-built course that aligns sales tactics, pour control, and guest experience may dramatically boost revenue. Tripling revenue is possible on targeted nights such as events and weekends, while a 20–50% increase is usual across all nights.
Final checklist before you launch
• Define KPIs and capture baseline numbers.
• Train managers first so they can coach during live shifts.
• Keep scripts short. Practice them during slow hours.
• Start with a simple nightly incentive and scale up as staff adapts.
• Reassess the menu with real POS data after 30 days, then adjust.
Conclusion
Bar owner training is not just a nice extra. It is the key strategy that turns your traffic into real revenue. With a focused curriculum, clear goals, and rewards that link staff behavior with business outcomes, you can lift nightly sales without leaning only on marketing or price increases. Start with an audit, train your managers, launch a 6-week program, and track your KPIs. The revenue gains will come.
BLOG
Why smart ID verification matters right now
Smart ID verification matters now because customers seek fast sign-ups and fraudsters work hard. The system must catch imposters and fake identities while helping real users. Strong checks build trust, lower chargebacks and fines, and protect your reputation—always with the user in mind.
What is modern ID verification?
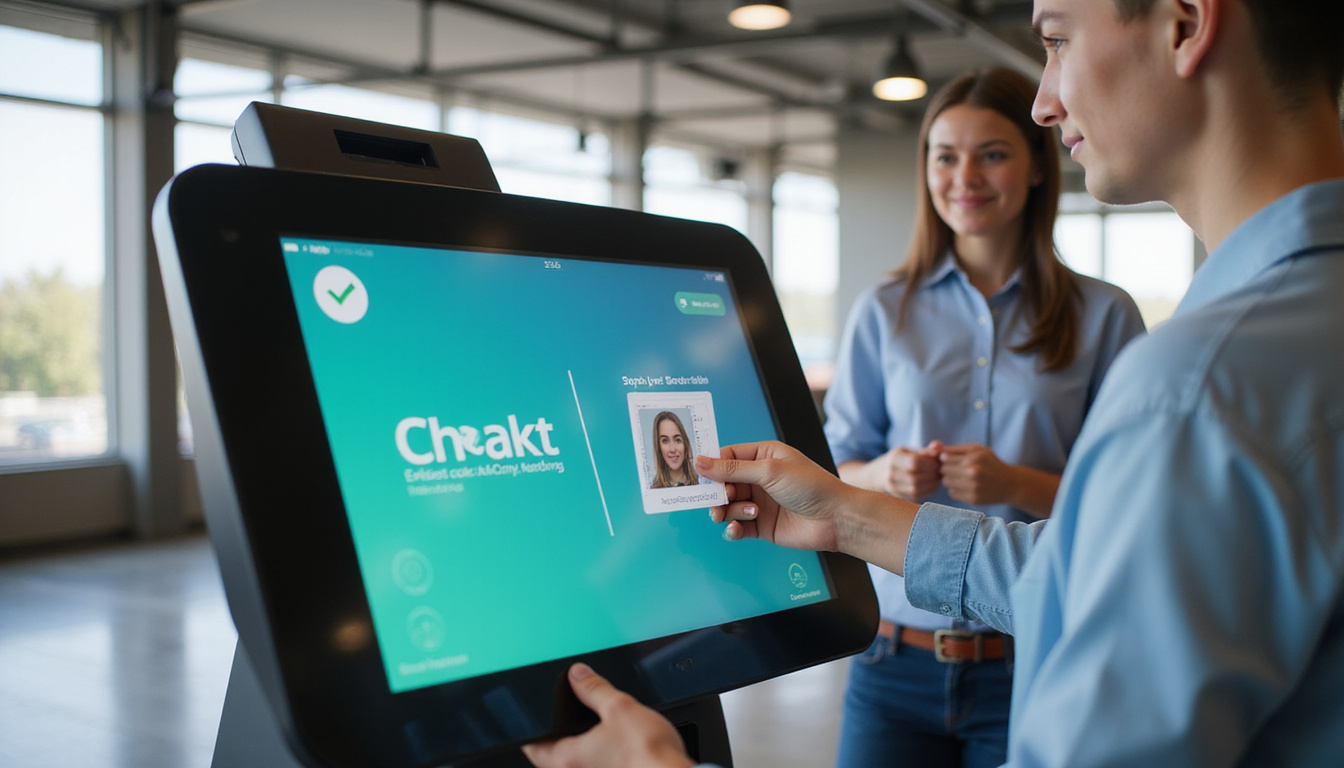
Modern ID verification confirms a person’s true identity. You may check a photo ID against a live selfie, match government IDs with trusted databases, or use device and behavior signals to spot fraud. The mix you choose depends on your industry, risk levels, and customer needs.
Types of ID verification methods
- Document verification: Scan passports, driver’s licenses, or national IDs. Then use OCR and forensic checks to ensure they are real.
- Biometric checks: Compare a live selfie with the ID photo. Use liveness detection to stop spoofing.
- Database and registry checks: Match user details with government or commercial sources.
- Knowledge-based authentication (KBA): Ask questions only the real user can answer. (This method is now less popular because data is easier to get.)
- Device and behavioral signals: Look at device fingerprints, typing styles, and geolocation to catch odd behavior.
- Multi-factor verification: Combine two or more methods (like document scan plus phone check) for better assurance.
Balancing fraud prevention with a great customer experience
Strict checks cause friction and drop-offs; loose checks invite fraud. Use a layered, risk-based approach. Check strongly only when risk indicators show a problem. This way, honest users speed through while high-risk cases get extra checks.
Practical steps to stop fraud fast while keeping customers happy
- Use risk-based flows: Start with low-friction checks. Escalate only when risk signs, like location mismatches or high amounts, appear.
- Offer multiple verification paths: If one document scan fails, let the user try phone checks or live video.
- Optimize for mobile: Make sure document captures and selfie steps work well on mobile. Give clear prompts and feedback.
- Provide clear, friendly error messages: Explain why a check failed and how to fix it. Do not use vague “verification failed” notes.
- Minimize data requests: Ask only what you need. Use progressive profiling to get extra info later.
- Test and measure continuously: Use A/B tests to balance security and conversion.
Use cases and real-world examples
- Fintech onboarding: With risk-based checks, users get a fast low-value account. For high-value transfers, the system asks for stronger proof.
- Marketplaces: Quick checks stop fake seller accounts and protect buyers without slowing down listings.
- Healthcare portals: Use strong identity proofing to let users view records. Still support elderly users with assisted verification channels.
Best practices checklist (numbered)
- Map risk by user action and use checks that fit the risk level.
- Combine document checks with biometric verification for high assurance.
- Use liveness detection and anti-spoofing for selfies.
- Use trusted data sources like government registries or credit bureaus.
- Offer backup verification paths and live support for tough cases.
- Encrypt personal data in transit and at rest. Follow strict data retention and deletion policies.
- Monitor rates of false rejections and false accepts. Optimize models to reduce friction.
- Design a mobile-first experience with step-by-step guidance and visual cues.
Measuring success: KPIs that matter
- Conversion rate: The percent of users who complete onboarding.
- Friction rate: The drop-off during ID verification steps.
- False reject rate (FRR): The rate at which real users are blocked.
- False accept rate (FAR): The rate at which fraudsters are approved.
- Time to verification: The average time for checks.
- Chargeback and fraud loss reduction: The business impact.
Technology considerations and integration tips
- APIs and modularity: Choose ID verification vendors with modular APIs. Connect document, biometric, and signal checks as needed.
- Latency and UX: Some checks work in the background. Show a progress indicator so users can continue.
- Localization: Support local ID formats, languages, and user behavior.
- Accessibility: Include options for users unable to provide selfies. Offer phone verification or in-branch help instead.
Privacy and compliance: design for trust
ID verification uses sensitive data. Build systems that limit data collection. Get clear consent and keep data only as the law requires. Follow rules like GDPR and CCPA. Use guidelines such as NIST’s Digital Identity Guidelines (SP 800-63) (https://pages.nist.gov/800-63-3/). Clear privacy notices and simple support contacts boost trust.
Reducing false positives and customer frustration
False rejects hurt customers. Reduce them by:
- Improving the image capture process with better lighting tips and real-time feedback.
- Using machine learning models trained on diverse data. This helps avoid bias.
- Offering fast human reviews for borderline cases.
- Giving clear next steps and ways to appeal or retry verification.
Operational tips for customer support teams
- Give agents secure, limited tools to view check status and help users.
- Create simple scripts and templates that explain why a check failed.
- Track common reasons for failure and share them with product teams.
- Set clear time limits for manual reviews to keep delays short.
When to step up verification: sample risk triggers
- A new account with a high deposit.
- Multiple failed logins or checks.
- Conflicting geolocation or rapid device changes.
- Suspicious email domains or disposable phone numbers.
- High-value or unusual transactions.
Vendor selection guide: what to ask
- What checks do you support? How modular is the system?
- How fast and accurate are document and biometric checks?
- How do you handle edge cases and appeals?
- What data protection and compliance certifications do you hold?
- Can the solution be localized and integrated with support systems?
Cost vs. benefit: framing ROI
Good ID verification cuts regulatory fines, fraud losses, and chargebacks. Compare current losses and costs with the savings from layered checks. Also note the improvements in conversion and customer lifetime value from smoother onboarding.
FAQ
Q: What is the difference between ID verification and identity verification?
A: They are often used in the same way. ID verification usually means checking official documents. Identity verification may also use biometrics, device data, and behavior patterns.
Q: How long does ID verification take?
A: It depends on the method. Automated document and biometric checks can be done in seconds or minutes. Manual reviews or database checks might take hours or a day. Risk-based flows let low-risk users finish quickly, while higher-risk cases get extra checks.
Q: Are ID checks secure and privacy-friendly?
A: Yes, when done properly. Use encryption and keep data to a minimum. Obtain clear consent and follow legal rules (like GDPR). Choose vendors with strong security certifications and clear privacy policies.
Conclusion: stop fraud without sacrificing happiness
ID verification stops fraud when it puts the user first. Use risk-based flows, mix multiple signals, optimize for mobile, and give clear help for edge cases. Measure results and improve the system. This way, you reduce friction for real users and catch bad actors. For more on technical standards and identity proofing, see NIST’s Digital Identity Guidelines (SP 800-63) (https://pages.nist.gov/800-63-3/).