BLOG

BLOG
If your business sells or serves alcohol in New Orleans, you must know the rules of the New Orleans responsible vendor system. This rule helps you stay legal, avoid fines, and keep permits in order. Whether you work at a Bourbon Street bar, a neighborhood restaurant, a corner store, or a special event venue, the Responsible Vendor (RV) system is key.
This guide explains what “responsible vendor” means in New Orleans. It shows how the law works in Louisiana, what training you need, and how you can turn compliance into an advantage for your business.
What Is the New Orleans Responsible Vendor Program?
The Responsible Vendor (RV) Program is a state rule that everyone must follow. Louisiana law requires all servers to learn about responsible alcohol and tobacco sales. The Louisiana Office of Alcohol and Tobacco Control (ATC) runs the system. In New Orleans the system works like it does for the entire state, with extra local rules.
The program aims to:
• Reduce the sale of alcohol and tobacco to minors
• Support safe alcohol service
• Promote public safety and lower alcohol-related problems
• Protect businesses and employees who follow the rules
In New Orleans, where alcohol is important for tourism, nightlife, and events, compliance is checked regularly.
Who Needs New Orleans Responsible Vendor Certification?
Anyone in New Orleans who sells or serves alcohol or tobacco must have Responsible Vendor certification. This includes:
• Bartenders and barbacks
• Servers and waitstaff who bring drinks to tables
• Cashiers at convenience, grocery, or liquor stores
• Event staff serving alcohol at festivals or private events
• Managers and supervisors who oversee these sales
Although owners may not need a card if they do not sell or serve directly, many get one for extra protection and credibility.
Key point: If you check IDs, pour drinks, ring up sales, or supervise these tasks, you need a New Orleans responsible vendor card.
Legal Framework: State Law + Local Enforcement
Knowing the law helps you understand why New Orleans rules are strict.
• Louisiana State Law
Louisiana Revised Statutes (La. R.S. 26 for alcohol and La. R.S. 26:900 et seq. for tobacco) set age limits, training rules, and penalties for breaking the law. The Louisiana ATC checks inspections and issues permits.
• New Orleans Local Rules
New Orleans adds more rules. City permits or licenses may be lost if you do not follow the vendor rules. Repeated violations such as overserving or serving minors bring the attention of local police. During busy events like Mardi Gras, extra checks occur. In short, any untrained staff can risk the entire operation.
Core Requirements for New Orleans Responsible Vendor Compliance
To follow New Orleans responsible vendor laws, both businesses and employees must meet basic expectations.
-
Approved Training
Every server or seller must complete an ATC-approved course. The course in simple terms covers:
• Alcohol and tobacco laws in Louisiana
• Your legal duties
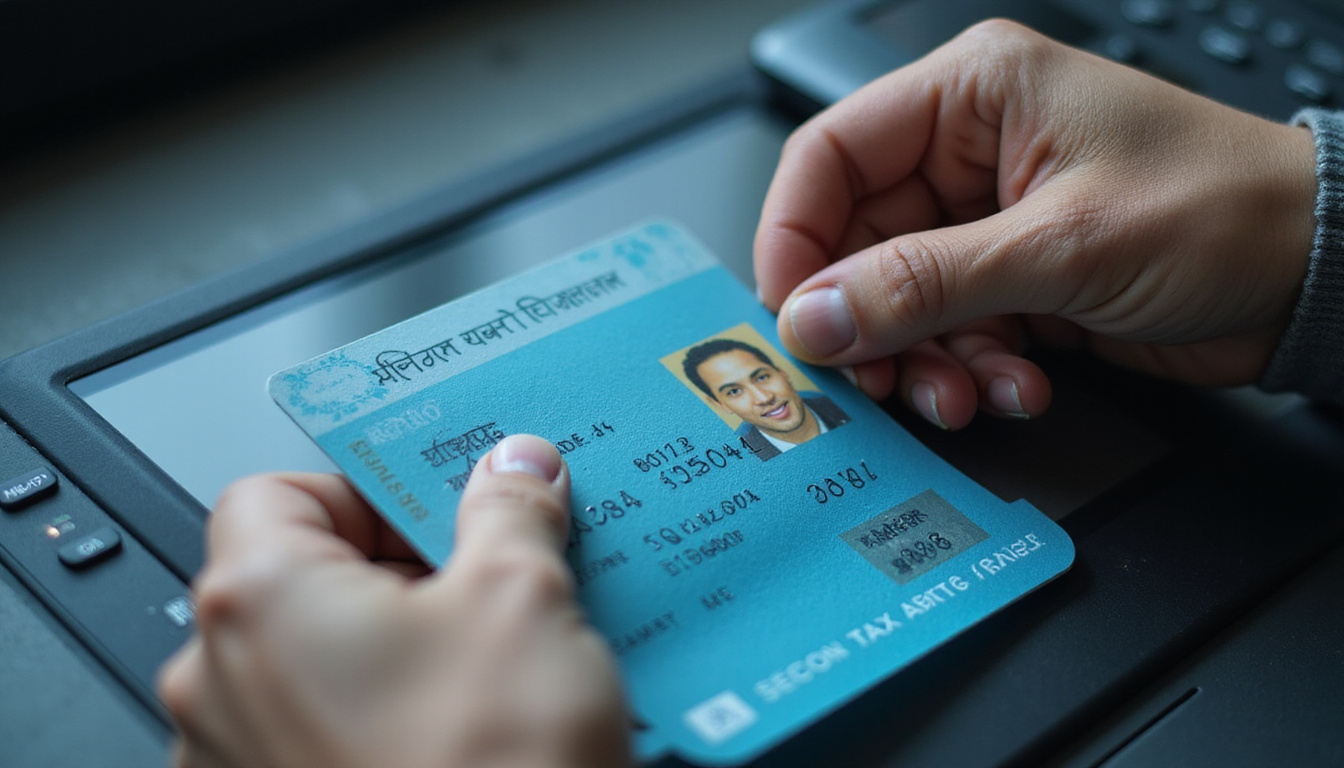
• How to check IDs properly
• How to spot fake or altered IDs
• How to see signs of intoxication
• When and how to refuse service safely
• Recordkeeping and best practices
-
Server Permit (RV Card)
After you pass the course, your details go to the ATC. You then receive a Responsible Vendor Server Permit (RV card). This card usually stays valid for four years. Keep a copy with you when working. Some businesses also keep copies on file.
-
Timeframe for New Employees
New employees usually have 45 days from their hire date to complete training and get their RV card. Some rules let you work with limits until you train. Still, it is safest to complete training soon.
-
Business Recordkeeping
A compliant business must:
• Keep a current list of employees with RV cards
• Keep copies of RV cards and training certificates on site
• Update records when staff change
• Show these records during ATC or local authority inspections
How to Get New Orleans Responsible Vendor Certification: Step-by-Step
Follow these steps if you are an employee or owner helping your staff stay compliant.
Step 1: Confirm Eligibility
• You must be at least 18 years old (some venues may require 21).
• You need valid identification like a driver’s license, state ID, or passport.
Step 2: Choose an ATC-Approved Provider
• Visit the ATC website for a list of approved training programs.
• Ask your employer for a recommendation.
• Compare courses (online versus in classroom), cost, and language options.
Step 3: Complete the Course
• Courses take between 2 and 4 hours.
• You learn the state and local laws, see real-life scenarios, and answer quiz questions.
Step 4: Pass the Exam
• You must get a passing score.
• If you fail, many providers let you retake the exam (sometimes with a fee).
• Once you pass, the provider sends your details to the ATC, and you get your RV card electronically or by mail.
Step 5: Keep Your Card Current
• Before your RV card expires, take a renewal course.
• Ensure your training is done on time so your card always stays active.
• Update your employer with your new expiration date.
Key Topics Covered in New Orleans Responsible Vendor Training
Training is not just a formality. It gives you tools you use every day.
• ID Checking and Preventing Sales to Minors
You learn the legal age for alcohol and tobacco. The training shows which IDs are acceptable. You learn to spot fake or altered IDs and how to refuse a sale if an ID seems wrong.
• Recognizing and Handling Intoxication
You learn to notice early signs of intoxication. You see how to watch drink counts and pace in busy settings. Training explains how to refuse service to intoxicated persons and how to de-escalate problems.
• Understanding Liability and Legal Consequences
The training tells you about personal penalties like fines or card loss. It explains employer risks such as fines or license loss. Good recordkeeping is shown as a way to protect yourself.
Penalties for Non-Compliance in New Orleans
Breaking the New Orleans responsible vendor rules has serious consequences.

For individuals, violations can lead to:
• Fines for serving minors or intoxicated people
• Suspension or loss of the RV card
• Possible criminal charges in severe cases
For businesses, failing to comply may mean:
• Fines from the ATC or the City of New Orleans
• Suspension or loss of alcohol/tobacco permits
• Loss of city licenses
• Bad publicity and community complaints
• More frequent inspections and enforcement actions
Repeated rule violations can even force a business to close.
Turning Compliance into a Business Advantage
When you view responsible vendor rules as a tool rather than a chore, you can make your business stronger.
Build Customer and Community Trust
• Customers notice when staff check IDs properly.
• Guests see that intoxicated persons are handled safely.
• Staff know the rules and follow them carefully.
This leads to fewer problems and more repeat customers.
Reduce Risk and Insurance Costs
• Good training lowers the chance of overserving and lawsuits.
• Accidents or fights become less likely.
• Some insurers reward strong training programs with lower premiums.
Improve Staff Confidence and Retention
• When staff know their laws and protections, they feel valued.
• Better training raises morale and lowers staff turnover.
Best Practices for New Orleans Responsible Vendor Success
Here are some practical practices to go beyond simple compliance.
-
Make Training Part of Onboarding
• Require that new employees join an RV course in the first week.
• Pair new hires with experienced, certified staff.
• Offer an internal handbook with house rules and local details.
-
Hold Regular Refresher Sessions
• Host meetings quarterly or every six months.
• Review past incidents and ways to improve.
• Practice handling fake IDs or stubborn groups with scenarios.
-
Standardize ID-Check Policies
• Decide whether to check everyone under a certain age.
• Train staff to follow this rule every time.
• Display signs about ID requirements so customers know the rule.
-
Document Problem Incidents
• Keep a log with the date, time, and basic facts when service is refused.
• Note the staff involved and any recorded footage.
• Use this log if a complaint or investigation occurs.
-
Collaborate with Local Authorities
• Attend community meetings if you operate in busy areas like the French Quarter or CBD.
• Invite local police or ATC representatives for training or Q&A sessions.
• Stay updated on enforcement trends and any targeted campaigns.
Checklist: Are You New Orleans Responsible Vendor Ready?
Use this checklist to see if you meet the requirements:
- All staff selling or serving alcohol or tobacco have a valid RV card.
- Copies of RV cards and training certificates are kept on site and current.
- New employees complete Responsible Vendor training within the legal timeframe.
- A written ID-check policy is in place (including rules on age and acceptable IDs).
- Staff are trained to refuse service to minors or visibly intoxicated persons and know when to call a manager or security.
- Incident logs for refused service, fake IDs, or disturbances are maintained.
- Management stays current on ATC updates and New Orleans local practices.
- There is a clear process to renew RV cards before they expire.
If you do not meet all these points, you have gaps to close.
Frequently Asked Questions About New Orleans Responsible Vendor Requirements
-
How do I get a New Orleans responsible vendor card, and how long does it last?
• Complete an ATC-approved Responsible Vendor course, pass the exam, and the provider sends your details to the ATC.
• The ATC then issues your RV card. This card usually lasts about four years. Always check the ATC website for the latest information.
-
Do all bartenders and servers in New Orleans need responsible server training?
• Yes. Any bartender, server, or cashier who handles alcohol or tobacco must complete the training through an approved program.
• This rule applies to bars, restaurants, stores, music venues, and special events. Many managers also obtain an RV card for extra protection.
-
What happens if my business is not following New Orleans alcohol responsible vendor rules?
• Your business could face fines, and permits may be suspended or lost.
• Employees may lose their RV cards or face fines.
• Repeated non-compliance can lead to more inspections, complaints, and potential lawsuits.
Staying compliant with the New Orleans responsible vendor program is more than a legal duty—it protects your guests, staff, and business. With proper training, careful ID checks, and ongoing education, you follow the law and build a safer, stronger operation in one of America’s liveliest hospitality markets.
BLOG
De-escalation training is essential in workplaces, schools, healthcare, customer service, and public safety. It calms emotions and protects people. It preserves relationships and prevents harm. This training teaches skills. These skills are learnable and backed by research and experience.
This guide explains de-escalation training. It shows why it works and which techniques defuse heated situations.
What is de-escalation training?
De-escalation training helps you notice rising tension and respond in ways that lower emotions. It stops aggression and steers conversation toward cooperation rather than fight.
This training teaches you to:
• Read verbal and nonverbal signals
• Manage your own emotions
• Use calm speech
• Keep everyone safe
• Know when to step back or ask for help
It is not only for law enforcement or security. Teachers, nurses, HR staff, managers, and others also gain value from these skills.
Why de-escalation training matters now more than ever
High-stress environments appear more often. Healthcare can be overloaded. Customers can feel frustrated. Financial pressures and social tensions create conflict. Without training, people react by arguing, defending, or shutting down. These reactions make conflict worse.
Good de-escalation training can:
• Reduce violence and injuries by stopping escalation early
• Lower stress and burnout for staff facing hard behaviors
• Build trust and satisfaction among customers, patients, and community members
• Cut down on liability and complaints for organizations
Research shows that clear communication and de-escalation programs cut aggressive incidents. They can reduce the need for physical force especially in healthcare and mental health settings (source: NIH).
The psychology behind conflict and escalation
De-escalation works best when you understand the deep feelings behind conflict.
Fight, flight, or freeze
When a person feels threatened or disrespected, the brain goes into survival. In that state, raw emotion overcomes logic. The person may show:
• A raised voice and fast speech
• A tense or aggressive body
• Sweating or a flushed face
• Narrow, fixed attention
Arguing facts or trying to correct that person will often fail. They act based on feelings rather than reason.
Perception of threat and loss of control
Escalation comes from feelings that include:
• Not being heard
• Feeling treated unfairly
• Fear or anxiety
• Losing control over what comes next
De-escalation training lowers the threat. It gives the person back some control. It lets them feel heard and respected.
Core principles of effective de-escalation
Good de-escalation relies on a few simple ideas:
-
Safety comes first.
Protect everyone, including yourself. Sometimes you must step away or call for help.
-
Control yourself, not the other person.
You cannot force calm. You can only calm your tone, gestures, and words. This may help the other person relax.
-
Use respect and dignity.
Treat everyone kindly even when they are upset. This way, you reduce shame and defensiveness and build trust.
-
Choose patience over speed.
Rushing to fix problems can backfire. Time helps settle emotions and makes people feel listened to.
-
Seek collaboration rather than confrontation.
Say, “Let us solve this together,” not “You are the problem.” This approach lowers resistance and invites help.
Step-by-step de-escalation techniques you can use immediately
Below are practical steps taken from common training programs. You may not need every step every time. This framework often works well in heated moments.
1. Check your own state first
You cannot help another if you are angry or scared.
• Notice your breath, heart beating, and thoughts.
• Take a slow, deep breath before you speak.
• Remind yourself: “I seek safety and calm, not victory.”
A short pause can stop reactive words.
2. Use nonthreatening body language
Your body speaks strongly.
• Stand at an angle rather than face-to-face.
• Keep your hands open and relaxed.
• Stay at a distance that feels safe but shows you care.
• Soften your face and use gentle eye contact.
Avoid quick movements, pointing, crossed arms, or standing over someone. These actions can feel scary.
3. Lower your voice and slow your pace
High emotion spreads fast.
• Speak more slowly and softly than usual.
• Use a calm tone. Avoid sarcasm or sharp words.
• Use short, clear sentences.
This method cools the mood and shows you are in control.
4. Acknowledge emotions before facts
Jumping to solve a problem may seem dismissive. Instead:
• Name what you see:
“You seem very frustrated right now.”
“I see you feel overwhelmed.”
• Validate the feeling (not the behavior):
“Anyone would feel upset in your spot.”
“It makes sense to feel this way when you feel unheard.”
When people feel understood, they listen better.
5. Listen more than you talk
Active listening is key.
• Let the person talk without interruption.
• Use prompts like “I see” or “Go on.”
• Repeat what you heard: “So you are worried about… Is that right?”
• Ask more questions after they have shared.
This controlled venting can ease strong emotions.
6. Set respectful boundaries
De-escalation does not mean you accept abuse. Stay calm and firm.
Use statements like “if/then” or “when/then”:
• “I want to help, but I cannot while you shout. When your voice lowers, I can listen better.”
• “I understand you are upset. If insulting happens, I must step away.”
Speak neutrally, not as a threat or challenge.
7. Offer choices to restore a sense of control
Giving limited choices makes the person feel less trapped:
• “Would you prefer talking here or in a quiet room?”
• “We can try another option now or meet later. Which works for you?”
• “You may wait for a supervisor or we can file your concern right now.”
Even small choices lower resistance.
8. Collaborate on a next step
After emotions cool, focus on solving the problem:
• Summarize: “Here is what I understand so far…”
• Ask about their idea: “What outcome would you like?”
• Find common ground: “We both want a fair solution.”
Then, agree on real next steps and be clear about limits.
Practical examples of de-escalation in different settings
Workplace and office conflicts
Situation: Two team members argue loudly about duties in a shared space.
Approach:
• Calmly separate them: “Let us move to a private room to talk.”
• Let each share their view without interruption.
• Reflect back what you heard.
• Reframe: “We all want the project to succeed. Let us agree on a fair way to split tasks.”
Customer service and retail
Situation: A customer shouts about a billing error.
Approach:
• Use a calm tone: “I see you are frustrated.”
• Validate: “I would be upset too if overcharged.”
• Clarify: “Let me look at your account with you.”
• Offer choices: “We can fix this now or I can connect you with billing.”
Healthcare and mental health settings
Situation: A patient becomes agitated about wait times or treatment.
Approach:
• Use empathy: “You have waited long and feel in pain. That is hard.”
• Explain simply what is happening.
• Give choices: “We can adjust your appointment or I can see if someone is available sooner.”
In high-risk cases, professionals also use team-based plans and special risk checks.
Skills to develop through formal de-escalation training
You can try many techniques immediately. But structured training helps practice them in real situations.
Effective programs often include:
• Role-play and simulations
Practice with real-life scripts and guided feedback.
• Recognizing early signs
Learn body language, speech, and behavioral cues that show increasing risk.
• Cultural competence
Understand how culture and background affect communication and respect.
• Trauma-informed approaches
Learn that past hurts can increase reactions and adjust your method to avoid more pain.
• Team-based strategies
Learn to support colleagues, share roles, and ask for help quickly.
For an organization, regular drills and refreshers help keep skills strong and introduce new staff to the same methods.
Common mistakes that make situations worse
Even good people can add heat to a tense moment. De-escalation training helps you avoid errors such as:
• Arguing about who is right, instead of focusing on the person’s feelings and a solution.
• Using absolutes like “You always…” or “You never…”
• Correcting someone publicly, which makes them feel shamed and defensive.
• Promising what you cannot deliver, which breaks trust.
• Rising to match the intensity by using insults or sarcasm.
• Ignoring your own limits and staying too long in a risky situation.
Seeing these patterns in yourself helps you master de-escalation.
Implementing de-escalation training in your organization
If you manage a team or workplace, a systematic plan brings best results.
-
Assess risk and needs
• Where do conflicts arise?
• Who faces the most stress (front-line staff, supervisors, security)?
• What incidents happened in the past year?
-
Choose or design the right program
Look for training that is:
• Based on research
• Tailored to your field
• Interactive, not just lectures
-
Set clear policies and expectations
• Define behaviors that are not acceptable.
• Explain when to step back or alert security.
• Ensure staff know that safety comes first.
-
Reinforce and refresh regularly
• Include de-escalation in new staff training.
• Run refresher sessions and practical drills.
• Discuss major incidents and learn what works.
-
Support staff emotionally
Handling conflict is hard. Provide debriefs, peer support, or employee help programs.
Short FAQ: De-escalation training and conflict management
Q1: What is de-escalation skills training and who should take it?
De-escalation training teaches simple ways to calm tense moments. It helps you talk under pressure and cut out aggression. Teachers, healthcare workers, customer service reps, managers, security staff, and public-facing employees all benefit.
Q2: How effective is conflict de-escalation training in the workplace?
Good training cuts down on verbal abuse, threats, and fights. Workplaces that support training and clear rules see fewer complaints, injuries, and burnout.
Q3: What are the key parts of verbal de-escalation training?
Most programs cover: keeping your cool, using gentle language, active listening, showing care for feelings, setting clear boundaries, offering choices, and moving from anger to fixing the problem. Many also use role-plays to practice these skills.
De-escalation training gives you proven tools. It teaches you to see tension early, manage your own reactions, and speak in ways that respect and guide. These skills turn heated moments into chances for understanding and resolution.
BLOG
Effective licensee training protects your brand, satisfies regulators, and increases revenue. It is not optional but a core business system. You need good training if you run a franchise, distribution network, or any licensed business. Training turns your standards and intellectual property into clear, profitable actions in the field.
This guide explains how to design, deliver, and improve licensee training. It boosts both compliance and profits without overloading your partners or team.
Why Licensee Training Is Mission-Critical
License agreements tell licensees what to do. Training makes that happen.
When done well, training:
• Lowers legal and regulatory risks
• Protects brand consistency and customer experience
• Boosts sales and operational performance
• Speeds up new locations or partner ramp-up
• Grows licensee satisfaction and retention
In many fields like franchising and financial services, regulators and courts require strong training, documentation, and oversight. Weak training may seem like negligence, especially if consumers suffer harm. Strong training shows due diligence and acts as a reliable shield.
The International Franchise Association notes that steady training and support drive franchisee satisfaction and system growth (source).
The Business Case: How Training Drives Compliance and Profits
You can justify licensee training in three ways:
-
Fewer mistakes and violations
• Well-trained licensees avoid pricing errors, ad violations, and product mishandling.
• Fewer incidents save on legal costs, fines, and brand harm.
-
Higher productivity and revenue
• Training in sales, upselling, customer retention, and local marketing improves unit economics.
• Even small revenue gains per location add up across the network.
-
Faster break-even for new licensees
• A clear onboarding program shortens profit timelines.
• This approach makes your offer more attractive and boosts licensee survival.
Treat training as a profit tool rather than a sunk cost. Focus on key metrics like conversion rates, order value, repeat customers, and fewer complaints.
Core Pillars of an Effective Licensee Training Program
High-performing training rests on five pillars:
- Compliance and Risk Management
- Brand and Customer Experience
- Operational Excellence
- Sales and Local Marketing
- Leadership and Business Management
1. Compliance and Risk Management
This is the core of training. It must cover:
• Legal and regulatory rules for your industry and regions
• Data protection and privacy
• Health, safety, and environmental issues
• Advertising and promotions
• Use of trademarks and brand assets
• License agreement obligations
Make this content:
• Use plain language that shows clear do’s and don’ts.
• Include real examples of potential issues.
• Offer assessments that licensees must pass for certification.
2. Brand and Customer Experience
Your brand is what customers see in licensed locations. Training should:
• Explain your brand promise and position
• Show model customer interactions in person and online
• Set service standards and response times
• Define visual standards for signage, uniforms, store layout, and digital presence
• Align staff behavior with your brand values
Videos, role plays, and mystery-shopper feedback work well here.
3. Operational Excellence
Training must bring your operations manual to life:
• Show standard operating procedures (SOPs) for key tasks
• Explain quality control steps and audits
• Teach inventory management and supplier rules
• Demonstrate how to use systems (POS, CRM, ordering platforms)
• Clarify reporting lines and escalation paths
These steps are the engine room of your business model. The simpler and more direct they are, the more consistent your network becomes.
4. Sales and Local Marketing
Licensors often underinvest in this area. Yet it can drive big revenue gains.
Include:
• Consultative selling techniques that match your product or service
• Ready scripts for cross-selling and upselling
• Local store marketing guides and templates
• Guidelines for social media and online review management
• Steps for handling leads and follow-up best practices
Make these tools practical with templates, scripts, checklists, and “campaign kits” licensees can use in days.
5. Leadership and Business Management
Licensees must also run a small business. Training here should cover:
• Financial basics like P&L, cash flow, and key ratios
• KPI tracking and benchmarking
• Hiring, onboarding, and local staff training
• Performance management and coaching
• Time management and task prioritization
This training can mark the line between struggling and top-performing licensees.
Designing a Licensee Training Strategy That Scales
A clear strategy stops your program from turning into a random set of webinars and PDFs. Follow three design principles:
Map Training to the Licensee Journey
Training needs change as licensees grow:
• Pre-signing: Introduce the business model and set expectations
• Onboarding (0–90 days): Teach core compliance, brand, and operations
• Stabilization (3–12 months): Deepen sales, marketing, and financial skills
• Growth (1 year +): Advance to multi-unit management and leadership
• Change Moments: Add modules for new products, regulatory updates, or system changes
Build a curriculum that matches these stages. Avoid overloading new licensees with advanced topics too soon.
Blend Training Formats
People learn best in different ways. Use a mix:
• In-person workshops or bootcamps for onboarding and hands-on skills
• Virtual sessions for refreshers and Q&A
• Self-paced e-learning for compliance and basic SOPs
• On-the-job coaching for real-world practice
• Microlearning with short videos or lessons to support daily tasks
A learning management system (LMS) can organize these formats and track progress.
Set Clear Learning Objectives and KPIs
For each training module, state clearly:
• What participants must know
• What tasks they must be able to do
• What behaviors or metrics they should show
Then tie these goals to measurable KPIs, such as:
• Time to open or first profitable month
• Compliance audit scores and incident counts
• Average ticket size, close rate, or customer ratings (CSAT/NPS)
• Staff turnover at licensed sites
This clarity helps you refine your training over time.
Content Essentials: What Every Licensee Needs
A modern training program should include:
-
Structured Onboarding Program
• Introduction to your brand, culture, and expectations
• Core modules on compliance and risk
• Training on key systems and tools
• A clear “first 90 days” checklist
-
Digital Operations Manual
• An online manual that is searchable and version-controlled
• Integration with training modules and quick guides
-
Certification Paths
• Role-specific courses and assessments for owners, managers, and staff
• Badges or certificates that can be revoked if needed
-
Update and Change Management
• Roll out training updates when you change policies, systems, or products
• Offer short, mandatory courses for important changes
-
Performance Support Tools
• Provide checklists, job aids, scripts, and troubleshooting guides
• Use mobile-friendly formats for quick access on the job
Best Practices for Delivering Licensee Training
Great content fails if the delivery is weak. Follow these practices for better impact:
Involve Top-Performing Licensees
Your best partners can share real knowledge and earn trust.
• Use them as co-trainers, panelists, or case-study examples
• Record their “playbooks” as training modules
• Help create peer learning groups
This method reduces resistance and shows that training works in real life.
Make Training Mandatory – But Valuable
Compliance training must be required. Still, make it engaging:
• Keep modules short and interactive
• Use real case studies of what happens when rules are broken
• Offer recognition, certifications, or benefits for completion
Tie training completion to access to perks like marketing funds, advanced tools, or new products.
Localize Where Needed
For global or multi-regional networks, adapt training to:
• Local laws and regulations
• Language and cultural differences
• Specific market challenges
Keep core content consistent but allow for local adjustments.
Track, Measure, and Iterate
Use your LMS and field data to ask:
• Who has finished which modules?
• How do completion rates relate to performance?
• Where do licensees struggle on tests?
• What common support questions arise?
Let these answers guide updates and new modules.
Technology’s Role in Modern Licensee Training
You do not need a huge tech stack. A few tools can make training work better:
Learning Management System (LMS)
Choose an LMS with:
• User management and role-based access
• Course authoring or easy integration with common formats
• Built-in assessments and certification tracking
• Mobile access and offline use if needed
• Integration with your CRM or partner portal
Content Creation Tools
These tools help your experts record videos, screen recordings, and interactive quizzes. Short, real-location videos often perform better than polished studio videos.
Analytics and Dashboards
Link training data with sales and operational data to find patterns. For instance:
• Managers with financial training certification might hit 15% higher margins.
• Units with the latest service training may get better online ratings and fewer complaints.
These insights help prove your training investment is worthwhile.
Overcoming Common Challenges in Licensee Training
Even a strong plan faces obstacles. Address these head-on:
“We Don’t Have Time for Training”
Licensees are busy, especially early on. Fix this by:
• Offering short, focused modules
• Allowing flexible access (mobile, on-demand)
• Showing data that training saves time by reducing mistakes and boosting performance
Break longer courses into 10–15 minute segments that fit into a busy day.
Resistance to Compliance Content
Some partners see compliance as a chore. Change the view by:
• Stressing how training protects their investment and limits personal risk
• Sharing examples of competitors harmed by non-compliance
• Explaining that regulators require training and clear records
Tie non-compliance to real risks in the license agreement.
Keeping Content Up to Date
Avoid outdated materials by:
• Assigning clear owners for each training area
• Scheduling regular reviews (for example, quarterly)
• Using version control and change updates
Train your team to update content so no one person holds all the control.
Measuring ROI: Proving the Value of Licensee Training
Show stakeholders that training pays off using a simple ROI framework:
-
Baseline Metrics Before Training
• Measure audit scores, incident rates, average revenue, margins, and ratings.
-
Training Intervention
• Launch new or improved modules to all or a subset of licensees.
-
Post-Training Metrics
• Compare the same KPIs while controlling for time and external factors.
-
Qualitative Feedback
• Collect surveys and interviews on training clarity and usefulness.
-
Cost vs. Benefit Calculation
• Cost: Track time, platform fees, trainers, and content creation.
• Benefit: Fewer fines, stronger performance, lower support costs, and higher retention.
Even a small drop in incidents or a slight revenue rise becomes clear evidence of success.
Practical Roadmap to Upgrade Your Licensee Training
If you need to start fresh or improve an old system, follow these steps:
-
Audit Current State
• Collect your current materials, sessions, and manuals.
• Interview licensees about gaps and pain points.
• Review recent compliance issues and performance gaps.
-
Define Objectives and Priorities
• Pick your top three goals (for example, reduce incidents by X%, cut time-to-opening by Y days, improve revenue per unit).
-
Design the Curriculum Framework
• Map modules to the licensee journey.
• Group content under compliance, brand, operations, sales/marketing, and leadership.
-
Choose Delivery Platforms
• Select or upgrade your LMS.
• Standardize formats (for example, a 2-page SOP and a 5-minute video).
-
Pilot with a Small Group
• Test new modules with a few licensees.
• Collect feedback and refine before a full rollout.
-
Roll Out and Communicate Clearly
• Announce timelines, expectations, and support resources.
• Tie training to benefits or requirements.
-
Monitor, Improve, and Celebrate Wins
• Share success stories and data.
• Recognize licensees who embrace training and show strong results.
FAQ: Licensee Training and Compliance
-
What should a licensee training program include?
A robust program covers compliance, legal rules, brand standards, core operations, sales, marketing, and basic business management skills. It should offer onboarding, regular refreshers, and role-specific certification.
-
How often should compliance training be updated?
Always update when regulations change, policies are revised, or gaps appear. At minimum, review content annually and require periodic re-certification for high-risk topics like data protection, health and safety, and advertising rules.
-
What is the best way to deliver franchise and licensee training?
Use a blended model. Combine in-person or virtual workshops for culture and onboarding with self-paced e-learning for core topics, plus field coaching for practical skills. An LMS centralizes training and tracks progress alongside performance data.
Well-designed licensee training does more than meet legal standards. It builds a stronger, more profitable network. By using training as a strategic system rather than a box to check, you create licensees who are compliant, confident, capable, and committed to growing your brand.
BLOG
A well-designed vendor workshop transforms how your organization works with its suppliers. It reduces costs, improves quality, and builds strong, long-term bonds. Leading procurement teams do not treat supplier negotiations as isolated events. Instead, they run structured workshops that closely connect goals, sharpen skills, and reveal hidden value in their supply base.
This guide walks you through designing, running, and scaling a vendor workshop that makes a real difference—not just a deck of slides.
What Is a Vendor Workshop (and Why It Matters Now)?
A vendor workshop is a structured session. It lasts from a half-day to several days. During the session, procurement, operations, finance, and other stakeholders work together or prepare to work with suppliers. They connect on items to:
• Improve negotiation strategies
• Align expectations on price, quality, and service
• Spot cost-saving and value-creation chances
• Strengthen supplier performance and bonds
In a world of changing demand, rising input costs, and supply chain disruptions, organizations that use vendor workshops gain a real edge. They shift from reactive cost cutting to strategic supplier management.
Core Goals of an Effective Vendor Workshop
Before you plan the session, define your goals. Typical goals include:
-
Reduce total cost of ownership
Not just unit prices, but also logistics, quality issues, delays, inventory, and admin costs.
-
Improve quality and consistency
Align specifications, tolerances, and targets; cut defects and rework.
-
Increase supplier reliability and resilience
Strengthen backup sources, predict lead times, and boost responsiveness.
-
Build internal negotiation ability
Empower your team to negotiate with confidence and consistency.
-
Elevate strategic supplier relationships
Shift key suppliers from transactional roles to collaborative partners.
Keeping 2–3 primary goals helps you stay focused and measure success.
Step 1: Clarify Scope and Stakeholders
Often, a vague scope harms a workshop. Decide early on who and what your workshop targets.
1. Who Is This For?
• An internal-only workshop focuses on training your procurement and cross-functional teams in vendor negotiation and management.
• A joint workshop with suppliers uses collaboration to improve cost, quality, innovation, and processes.
You may even run both types. You might hold an internal skill-building workshop before a supplier-focused session.
2. Which Categories and Suppliers?
Target suppliers by mapping your portfolio on impact and risk. They could be:
• Strategic direct materials (high spend and high risk)
• Critical services (IT, logistics, or maintenance)
• Indirect categories with many small suppliers (marketing or office supplies)
3. Who Should Be at the Table?
A complete session includes team members from:
• Procurement or sourcing
• Finance for cost, ROI, and payment terms
• Operations for quality, lead time, and practicality
• Quality or regulatory
• Engineering or R&D for specs and alternatives
• Key users or internal customers for service needs
For joint workshops, also include the vendor’s:
• Sales or account management
• Operations or planning
• Quality or technical staff
This mix ensures the session drives real improvements—not just talk.
Step 2: Analyze Spend and Supplier Performance Beforehand
A workshop built on data stands strong. Before the session, work on these analyses.
1. Conduct a Basic Spend Analysis
Gather for your scope:
• Total annual spend by supplier and category
• Price trends over time
• Order volume and frequency
• Payment terms and rebates
• Freight, incoterms, and logistics costs
Find risks like over-dependence on one supplier or too many small suppliers.
2. Review Supplier Performance
Use both measurable and qualitative metrics like:
• On-time delivery rates
• Defect or return rates
• Response times for issues
• Lead time and its variability
• Innovation and new ideas
• Relationship health and transparency
Supplier scorecards can help highlight the gaps.
3. Define Target Outcomes
From this analysis, set clear objectives. For example, aim to:
• Lower TCO by 5–8% within a year
• Reduce defect rates by 30%
• Cut lead times by 20%
• Consolidate the supplier list
• Negotiate better terms without raising prices
Share these targets with your team in advance. Everyone comes ready to contribute.
Step 3: Design the Vendor Workshop Agenda
A successful workshop moves from learning to analysis to action.
Example 1-Day Internal Vendor Workshop Agenda
-
Opening and Objectives (30–45 minutes)
• Explain why you are here (cost, quality, risk).
• Set clear outcomes and KPIs.
• Define ground rules and decision rights.
-
Negotiation Fundamentals Refresher (60–90 minutes)
• Compare interest-based and positional bargaining.
• Discuss BATNA and reservation price.
• Explain anchoring, framing, and concessions.
• Review common supplier tactics.
Run short role-plays to make it practical.
-
Deep Dive: Spend and Supplier Landscape (60 minutes)
• Present key data on spend and performance.
• Discuss where you hold leverage (volume, competition, alternatives).
• Map suppliers by their strategic and performance values.
-
Breakout Sessions: Strategy by Supplier or Category (90–120 minutes)
Teams answer key questions:
– What are our objectives (price, quality, terms, innovation)?
– Where does mutual value exist?
– What can we swap (such as volume or contract length) for better terms?
– What is our walk-away point?
-
Risk and Scenario Planning (45–60 minutes)
• Plan for supply disruptions.
• Identify alternative sources and dual-sourcing options.
• Build resilience in contracts.
-
Action Planning (60 minutes)
• Define a detailed negotiation plan per supplier or category.
• Assign roles and timelines.
• Decide what to share with each supplier.
For a joint session with suppliers, adjust the agenda by including:
• Transparent sharing of goals and constraints.
• Joint cost-driver analysis.
• Co-creation of process improvements.
• Alignment on SLAs, KPIs, and communication cadences.
Step 4: Build Strong Negotiation Strategies
Strong outcomes come from solid negotiation strategies planned during the workshop.
1. Define a Clear Negotiation Framework
For each supplier, document:
• Your business objectives (cost, quality, innovation, risk).
• The supplier’s goals (share of wallet, stability, margin, volume).
• Your BATNA.
• The range of outcomes you accept (target, stretch, and walk-away points).
• Your concession plan (what to give and in which order).
• “Red lines” you will not cross (for example, quality thresholds).
2. Look Beyond Unit Price
Sustainable cost improvements come from total value. Explore areas like:
• Better payment terms (e.g., 30 to 60 days).
• Volume discounts or guarantees.
• Freight responsibilities and routing.
• Optimized packaging.
• Adjusted minimum order quantities.
• Consolidated shipments to reduce costs.
• Vendor-managed inventory options.
Also, look into quality and process improvements that lower costs on both sides.
3. Use Data to Your Advantage
Build a strong “fact base” by gathering:
• Benchmark prices and terms from similar markets.
• Cost breakdowns (materials, labor, overhead, margin).
• Historical trends and issue logs.
Data gives you clear reasons when you ask for improvements.
Step 5: Integrate Quality and Continuous Improvement
Cost savings that harm quality bring net losses. Use the workshop to agree on what “good” means.
1. Clarify Specifications and Tolerances
• Check if your specs are over-engineered.
• See if cheaper materials or processes can meet actual needs.
• Allow more tolerance when risk is low.
Reviewing these points with suppliers can reveal cost-saving opportunities without lowering quality.
2. Agree on Quality Metrics and SLAs
Develop or refine measures such as:
• Defect rates and acceptable limits.
• Response times for issues.
• Corrective actions.
• Audit or inspection routines.
For key suppliers, create a joint quality improvement roadmap with clear KPIs.
3. Introduce Joint Improvement Projects
Use the workshop to start projects like:
• Reducing setup or changeover times.
• Standardizing packaging or labeling.
• Adopting lean practices.
• Co-designing manufacturable products.
These projects create win–win outcomes and deepen supplier engagement.
Step 6: Facilitation Best Practices for a Vendor Workshop
How you run the session matters as much as what you discuss.
1. Use a Neutral, Skilled Facilitator
A facilitator not tied to the supplier relation helps by:
• Keeping discussions balanced and on track.
• Bringing hidden issues or conflicts to light.
• Ensuring every function gets heard.
For high-stakes workshops, you might also work with an external negotiation expert.
2. Balance Structure with Flexibility
Set clear, time-bound segments but allow extra time when needed. Use:
• A precise agenda with objectives for each segment.
• Visual aids like whiteboards or digital boards.
• Pre-prepared templates for plans and risk assessments.
3. Encourage Constructive Challenge
Create a room where:
• Procurement questions operations’ hard specs.
• Finance challenges unjustified costs.
• Engineering questions legacy designs.
This culture pushes all participants to find solutions while respecting each other.
Step 7: Turn Workshop Insights into Real Results
Many workshops seem productive but then fall short. Close this gap with clear steps.
1. Document Clear Outputs
Finish the session with:
• A defined negotiation plan per supplier or category.
• A list of quality and process improvement projects.
• A risk mitigation plan (for example, backup suppliers).
• Clear ownership, milestones, and success measures.
Share a concise summary within 48 hours to keep momentum.
2. Build a Post-Workshop Timeline
Create a clear roadmap:
1. In 1 week: Finalize data and materials.
2. In 2–4 weeks: Begin the first supplier conversations.
3. In 8–12 weeks: Complete major negotiations and sign agreements.
4. Ongoing: Track KPIs, review quality, and make adjustments.
3. Monitor and Communicate Impact
Track metrics like:
• Savings achieved versus targets.
• Changes in quality and defect rates.
• Improvements in lead time and on-time delivery.
• Supplier satisfaction and relationship health.
Share results regularly with leadership and team members. This reinforces the workshop’s value.
Step 8: Create a Repeatable Vendor Workshop Program
Once you see results, standardize your workshop process so it becomes part of your routine.
Build a Toolkit
Include items such as:
• Agenda templates (for internal and joint sessions).
• Spend and supplier analysis templates.
• Negotiation planning worksheets.
• Supplier scorecard formats.
• Communication templates to invite suppliers.
Institutionalize Cadence
Plan your sessions by schedule:
• An annual strategic workshop for top-tier suppliers.
• Quarterly internal workshops focused on categories.
• Special workshops around key events like product launches or contract renewals.
This converts one-off events into ongoing supplier performance management.
Invest in Skills
Use every workshop to upskill your team in:
• Negotiation and influencing techniques.
• Data analysis and cost breakdown methods.
• Collaborative problem solving with suppliers.
• Contract and risk management.
A culture that centers on supplier management becomes a core strength, not an occasional project.
Practical Tips to Maximize Workshop Value
Follow these guidelines to keep your workshop focused and effective:
• Limit participants to those who add real value.
• Share pre-read materials so the session starts at the right level.
• Set clear decision rules (for example, who can approve what).
• Separate brainstorming time from decision time to avoid endless debates.
• Record action items as they happen, with owners and deadlines.
Sample Checklist for Planning Your Next Vendor Workshop
Use this checklist when preparing:
- Define primary goals (cost, quality, risk, innovation).
- Select the categories and suppliers you target.
- Identify and invite the key internal stakeholders.
- Decide if suppliers will attend the session.
- Complete your spend and performance analysis.
- Prepare the agenda and supporting materials (data packs, templates).
- Appoint a facilitator and note-taker.
- Clarify the decision rights and expected outcomes.
- Run the workshop and document the outputs.
- Follow through with negotiations and track the KPIs.
FAQ: Vendor Workshops and Supplier Negotiations
-
What is a vendor negotiation workshop, and how is it different from regular training?
A vendor negotiation workshop focuses on real suppliers, spend, and contracts. It blends skills training with concrete planning for upcoming supplier negotiations. This makes it both educational and directly actionable.
-
How often should we run a supplier negotiation workshop with key vendors?
For strategic suppliers, an annual session works well or one held ahead of major contract renewals or product launches. For broader categories, many organizations run internal workshops quarterly and invite suppliers to join when cost or quality improvements hold high potential.
-
Can a vendor management workshop help both cost savings and quality improvement at the same time?
Yes. A well-designed workshop looks at total value—not just the unit price. By examining specifications, process efficiency, and performance metrics together, you can reduce total cost while also improving quality and reliability.
Design and run your vendor workshop with clear goals, strong data, and firm follow-through. Focus on linking every decision closely with measurable action. By using structured sessions, you can cut costs, improve quality, and build robust, value-creating supplier relationships.
BLOG
ID scanner training remains a smart and high‐impact investment. It cuts legal risk, saves your license, and stops fake IDs at the door. Even advanced age-verification technology fails when staff misuse it. They must learn to use devices, read scans, and act fast. This guide shows you how to train your team. Good training boosts compliance, quickens lines, and helps your team catch fakes in real time.
Why ID Scanner Training Matters More Than Ever
Laws tighten around age-restricted sales and entry. Alcohol, tobacco, cannabis, gambling, and adult venues now face stricter rules. Fake IDs improve too. Regulators and law enforcement now demand strong verification and proof of training.
Effective ID scanner training does much. It
• Cuts the risk of selling to minors or letting in underage guests
• Guards your liquor, gaming, or business license
• Speeds up lines and checkout
• Builds staff confidence when facing tough customers
• Creates clear records for audits and investigations
Technology alone cannot help. Staff must know why each step matters to meet compliance and security.
Core Goals of Effective ID Scanner Training
Before you design training, state clear goals for every team member. Good ID scanner training builds these skills:
-
Operate the hardware and software correctly
• Turn on and log in properly
• Scan barcodes, stripes, or chips with care
• Fix common errors or timeouts
-
Interpret scan results with confidence
• Read age and expiration quickly
• Notice warning signs of fake or altered IDs
• Act when the scanner does not read the ID
-
Spot fake IDs that pass a basic scan
• Check the scanner output and look at the ID
• Watch for odd behavior and red flags
• Escalate problems when in doubt
-
Follow legal and policy rules
• Know the laws in your area
• Use your company’s refusal and report rules
• Respect privacy and data rules
-
Act professionally under pressure
• Calm conflicts
• Protect staff and customers
• Record incidents clearly and reliably
When you train for these outcomes, your program stays practical, measurable, and repeatable.
Key Components of a Strong ID Scanner Training Program
A strong training program need not be complex. It must be consistent. You can split training into four simple parts:
1. Device Basics and Daily Setup
Begin with the basics so no one feels lost.
• Hardware overview: Show where the scanner reads barcodes, stripes, and security marks. Compare handheld and fixed units if both are used.
• Power and connectivity: Explain how to charge, dock, and reconnect to Wi-Fi or Bluetooth.
• Login and user roles: Train staff to log in with their own credentials.
• Calibration and cleaning: Stress the need to clean lenses and check for damage.
Practice matters. Let staff follow the full start-of-shift routine.
2. Correct Scanning Techniques
Poor scanning slows work and brings false negatives. Training should cover:
• How to hold and position IDs: Use the right angle, distance, and orientation for the device.
• Different document types: Cover state IDs, passports, military IDs, international licenses, and phone-based digital IDs.
• Handling worn or damaged IDs: Teach when to try manual entry and when to refuse.
• Speed versus accuracy: Remind staff that one extra second saves repeated mistakes.
Show real scenarios like busy bar nights or dispensary rushes.
3. Reading and Responding to Results
Staff should look at the screen and know their next move. Scanner screens often show:
• Age results: “Under 21”, “21+”, or “Not of legal age”
• Expiration: “Expired ID” or “Valid ID”
• Flags: “Not recognized”, “Tampered”, or “Suspected fake”
Follow a simple decision tree.
– If the ID is underage or expired, staff must refuse entry or sale.
– If the ID seems fake or unreadable, they must call a manager or use secondary checks.
– If the ID is clear, they allow entry while staying alert.
Record any “suspected fake” as required.
4. Visual and Behavioral Checks Beyond the Scanner
Scanners are one part of a strong check. Training must also cover:
• Matching the photo with the person’s look: Hair, eyes, height, and build are clues.
• Security features: Holograms, UV marks, tactile text, and microprint help spot fakes.
• Signs of tampering:
– Odd lamination or bubbling
– Misaligned fonts or spacing
– Off background colors
– Scratches or edits near birth dates or photos
• Behavioral cues:
– Nervousness or avoiding eye contact
– Friends offering extra help
– Inconsistent birth date answers
Train staff to first use the scanner, then check visually when something seems off.
Legal and Compliance Fundamentals to Include in Training
Rules differ by region, but training should link to your laws. Cover at least these points:
• Legal age limits: Alcohol, tobacco, cannabis, lottery, or gaming rules may vary.
• Acceptable ID types: State IDs, passports, tribal IDs, military IDs, and digital wallets count.
• Duty of care: Use approved scanners and keep logs to show due diligence.
• Record-keeping: Explain how long to store data, who sees it, and what to do for an audit.
• Privacy rules: Many places limit artist storage of full ID images or extra personal data.
Link each law to what staff do daily. This makes abstract law into clear steps.
Building a Step-by-Step ID Scanner Training Plan
A good plan helps repeat training with each hire and refresh periodically.
Step 1: Short Policy and Law Overview
Start with a 15–20 minute session on:
• Why age verification matters
• Risks like fines, license loss, or closure
• Regulator expectations
• Your “no exceptions” rules
Keep it focused to avoid overload.
Step 2: Live Demonstration of the ID Scanner
An experienced trainer should show how to:
• Power on and log in
• Scan a variety of real or mock IDs
• Identify examples of:
– Valid adult ID
– Underage ID
– Expired ID
– Damaged or unreadable ID
Narrate every decision for clarity.
Step 3: Hands-On Practice with Coaching
This is the core of effective training. Have each trainee:
• Practice scanning multiple IDs
• Role-play refusing entry or sale in a calm way
• Handle “difficult customer” scenarios
Fix technique and language live. Let trainees repeat until they gain confidence.
Step 4: Simple Knowledge Check
Use a brief quiz or checklist to check that staff know:
• How to use the scanner
• What each on-screen message means
• When to refuse an ID
• Who to call when unsure
Keep records of training completion and scores for audits.
Step 5: On-the-Job Shadowing
Pair new staff with experienced colleagues during busy times:
• Let them watch first
• Then let them scan under supervision
• Offer feedback afterward
This shadowing turns classroom lessons into real habits.
Best Practices to Make ID Scanner Training Stick
Once you start training, these tips boost impact.
Keep Training Short, Focused, and Frequent
Instead of one long session, use:
• An initial 60–90 minute block
• Brief 10–15 minute refreshers every few months
• Quick “micro-training” sessions when rules change
Repetition builds skill and lowers errors.
Standardize Your Procedures
Use simple guides:
• Laminated cards with step-by-step instructions near scanners
• Posters for acceptable and unacceptable IDs in staff areas
• A refusal script that everyone uses
Consistency aids staff and minimizes mistakes.
Train for Peak-Stress Scenarios
Stress brings out habits. Include training for:
• A crowded bar near last call
• A regular with an expired ID
• A group pressuring staff to “let someone in”
Teach staff to slow down and scan properly even when rushed.
Involve Management and Security
Managers and security must support staff by:
• Following the same procedures
• Backing up staff when refusing IDs
• Handling escalations and conflicts
Visible support stops staff from bending the rules under stress.
Common Mistakes in ID Scanner Training (and How to Fix Them)
Many fall into common traps. Here are mistakes and fixes:
-
Relying only on on-the-job training
– Fix: Use a formal introductory session and checklist.
-
Teaching only the technology and not the law
– Fix: Always tie scanner use to legal reasons.
-
Ignoring fake IDs that pass scans
– Fix: Show that scanners are a tool, not a foolproof answer. Also use visual checks.
-
Not having a clear escalation policy
– Fix: Define who to call, what to say, and when to act.
-
One-and-done training
– Fix: Plan regular refreshers, especially with software or rule updates.
How to Measure the Success of Your ID Scanner Training
The goal is fewer violations and better safety. Track these leading signs:
• Refused IDs per week or month
• Unreadable or unrecognized ID incidents
• Audit results or mystery shopper scores
• Average time per scan during busy hours
• Staff reports of scanner confidence
If refusal rates drop too low compared to past data or local reports, staff may be under-enforcing. If rates are very high, check for misconfigured scanners or over-cautious staff. Use these signs to improve your training.
Quick Checklist: What Every Employee Should Know
After training, every staff member who checks IDs should be able to:
• Power on, log in, and set up the ID scanner
• Scan both physical and digital IDs correctly
• Recognize on-screen messages for age, expiration, or suspicion
• Do a quick visual and behavioral check after scanning
• Politely refuse entry or sale when needed
• Escalate issues to a manager or security
• Follow the company rules on privacy and data storage
If someone cannot do these without help, they need more practice or better guidance.
FAQ: ID Scanner Training, Fake IDs, and Compliance
Q1: How often should we provide ID scanner training for bar or nightclub staff?
A1: Provide full training to every new hire before they work alone, and offer refreshers every 6–12 months. Increase training after law changes, software upgrades, or compliance issues.
Q2: Can ID scanner training really help stop sophisticated fake IDs?
A2: Yes. When technology use pairs with visual and behavioral checks, staff can catch issues that devices alone may miss. Modern scanners flag data problems, and trained staff spot physical inconsistencies.
Q3: What should age verification and ID scanner training for retailers include?
A3: Retail training should cover accepted ID types, fast scanning during checkouts, reading pass/fail age results, handling expired or unreadable IDs, using a standard refusal script, and documenting incidents per company and legal rules.
Well-designed ID scanner training turns your devices into a powerful shield against fines, license loss, and damage to your reputation. Clear steps, hands-on practice, and regular refreshers give your team the skill and confidence to meet compliance and catch fake IDs—shift after shift.
BLOG
Managing alcohol service in a busy bar or restaurant is a high-stakes task.
Good last call training protects guests, staff, licenses, and your brand. It cuts the risk of overserving.
Staff who easily spot impairment, handle last call firmly, and step in early lower the chance of alcohol problems both inside and outside.
This guide lists clear, proven steps. It helps you boost your last call procedures, train your team, and build a culture of responsible service that still gives guests a great experience.
Why Last Call Training Matters More Than You Think
Last call is more than a closing notice.
It is the highest risk moment of a shift.
In the final 30–60 minutes:
• Guests rush to order many drinks.
• Intoxication may peak.
• Tension can rise between guests and staff.
• Staff feel tired and risk coasting to closing time.
Without steady, well-organized last call training, even experienced teams can make risky choices.
They might overserve someone who shows impairment.
They might handle refusals poorly.
They might let unsafe departures happen.
Any one of these can lead to:
• DUI crashes and injuries
• Fights or disturbances near the venue
• Legal trouble and lawsuits
• Fines, penalties, or loss of a liquor license
• Damage to your reputation online and in the community
Regulators and courts review your training and policies when they decide liability.
Good records of strong last call training, checklists, and documentation are not only smart—they add a key layer of protection.
Core Elements of Effective Last Call Training
A strong program does more than just tell staff to “stop serving at 1:45.”
It gives them clear tools, scripts, and limits.
Your program should cover at least:
-
Legal requirements and house rules
- List local last call times, overtime rules, and drink limits.
- Spell out rules on doubles, shots, and pitchers near closing.
- Explain ID checks and documentation standards.
-
Recognizing signs of intoxication
- Show signs like loud talk, aggression, or over-friendly behavior.
- Note physical cues such as slurred speech, stumbling, and glassy eyes.
- Watch ordering details: fast re-orders or switching to higher-ABV drinks.
-
Refusal skills and de-escalation
- Teach how to say “no” with clear professionalism.
- Use body language and tone that avoid confrontation.
- Know when to call a manager or security.
-
Safe last call workflow
- Use timelines and checklists for a controlled closing.
- Guide staff on how to manage bulk or round orders.
- Coordinate with security, hosts, and the kitchen.
-
Documentation and incident reporting
- State when to write an incident report.
- List what details to record: time, behavior, witnesses, and actions.
- Explain how and where to store these records.
When you build these steps into training, every employee learns both their duty and their protection.
Recognizing and Responding to Intoxication Before Last Call
A good strategy starts well before closing.
Early intervention keeps the risk low.
Behavioral and Physical Cues
Teach staff to observe guests and connect the signs.
They should not depend on a single clue.
Common red flags include:
• Ordering patterns:
– Smashing drinks, holding two cups, or quick refills.
– Abruptly switching from beer or wine to high-proof shots.
• Behavior changes:
– Raising voices, shouting, or interrupting others.
– Over-friendly or off comments.
– Arguing with staff or other guests.
• Physical cues:
– Trouble with money or cards.
– Frequent spills.
– Walking unsteadily, leaning, or swaying at the bar.
Stepwise Intervention
Train staff on a simple response ladder when signs appear:
- Slow service: Offer water and food; space out alcohol orders.
- Switch to non-alcoholic options: Suggest mocktails or soft drinks.
- Set limits: Say, “I can serve you one more drink if you also have food and water.”
- Refuse more alcohol: Use calm, clear, and consistent language.
- Arrange safe departure: Help call a cab or rideshare, or involve a friend or manager.
Using this step-by-step ladder makes the process feel more procedural than personal.
It helps staff act in a calm and consistent way.
Structuring Last Call to Minimize Risk
Chaos at last call can lead to overserving.
A clear, staged approach supports safer choices.
1. Establish a Clear Last Call Timeline
Create a set schedule and practice it in training:
• 60–45 minutes before closing:
– The kitchen slows and stops new full meals (if needed).
– Staff check tables for a “last round” of food or drinks.
• 30 minutes before closing:
– Announce last call officially.
– Staff walk the floor and take final drink orders, one per guest.
– No doubles or pitchers are allowed.
• 15 minutes before closing:
– Stop serving alcohol.
– Staff clear glasses, offer water or coffee, and settle bills.
• At closing:
– Guests finish drinks and leave promptly and safely.
– Staff debrief any incidents or unusual situations.
Using a written timeline in training builds consistency and simplifies enforcement.
2. Use Smart Limits on Last Call Orders
Limit what can be ordered at last call.
For example:
• No doubles, Long Islands, or high-volume shots after the limit.
• No pitchers or buckets within 30 minutes of closing.
• One drink per person is allowed at last call.
• No “to-go” alcohol unless it is legal and strictly controlled.
State these rules clearly.
Empower staff to cite the house policy instead of personal judgment.
3. Coordinate Across Roles
Last call is a team effort.
Define each role clearly in training:
• Bartenders: Manage service pace, watch guests, and enforce drink limits.
• Servers: Monitor table dynamics, start checks early, and share guest concerns.
• Hosts/Security: Support refusals, guard entrances and exits, and watch the parking lot.
• Managers: Back staff decisions, handle escalations, and ensure proper documentation.
Practice typical last call scenarios together so that every role knows its part in real time.
Communication Skills: Scripts That Support Your Team
Even skilled bartenders face conflict at last call.
Give them clear language to use in training.
Non-Confrontational Last Call Phrases
• “We’re doing last call now; I can get you one more drink before we close.”
• “Just a heads-up, we’re closing in 30 minutes, so this will be the last round.”
• “I can do one more for you now, but then we’re switching to non-alcoholic options.”
Refusal and De-escalation Scripts
When it is time to stop serving:
• “I’m not able to serve you any more alcohol tonight. I can get you water, soda, or something to eat.”
• “For your safety and ours, I need to cut you off from alcohol right now.”
• “Our policy is to stop serving when signs of intoxication appear. I know this is frustrating, but I must follow the policy.”
If a guest pushes back:
• “I hear you and understand that you are disappointed. The decision is final, but I can help with water, coffee, or a ride.”
• “It is not personal—it is our policy and responsibility. My manager can confirm that.”
Role-play these lines during training.
Speaking them out loud helps staff stay calm and consistent under pressure.
Building a Culture of Responsible Last Call
Policies and training work best when supported by strong culture.
Your team should know that:
• Managers back safe choices even if a sale is lost.
• Everyone is measured by responsibility, not just revenue.
• There is no extra “one more” for impaired friends, regulars, or VIPs.
To build this culture:
Lead by Example
Managers must model safe practices:
• They step in when orders look risky.
• They praise staff for sound judgement in tough moments.
• They do not overrule a refusal to serve a guest who appears intoxicated.
Align Incentives
Make sure staff income is not hurt by safe practices:
• Encourage early tabs and proper pacing so that income does not rely on the last 20 minutes.
• Offer bonuses or recognition for excellent handling of incidents and documentation.
• Track success by both safety and the absence of incidents.
Keep the Conversation Going
Last call training should be ongoing:
• Give brief pre-shift reminders about high-risk nights or large events.
• Hold quick debriefs after any incident to discuss what worked and what needs improvement.
• Run annual or semi-annual refreshers that include updates on laws and best practices.
The U.S. National Highway Traffic Safety Administration notes that alcohol-impaired driving causes about one third of all traffic deaths.
Good last call practices can help prevent an impaired guest from becoming a statistic.
Documentation, Incident Reports, and Legal Protection
Good documentation is a key part of last call training.
If an incident occurs, your records show that you acted responsibly.
Train staff and managers to:
• Fill out an incident report after a conflict, ejection, fight, or when a guest leaves extremely intoxicated.
• Record details like the date, time, venue location, names (and IDs if taken), observable behaviors, and the actions taken—such as a cut-off or offering water.
• Keep consistent records to track patterns and strengthen your position if regulators or lawyers review your actions.
Implementing a Formal Last Call Training Program
Treat last call training like any other vital safety program.
Steps to Implement
-
Assess your current practices.
Review recent incidents, near misses, and staff feedback.
Identify gaps in knowledge, consistency, or support.
-
Create written policies.
Document last call times, drink limits, and refusal procedures.
Clearly describe escalation paths and when to call security or police.
-
Develop a training curriculum.
Mix short sessions, role-play, and on-the-job coaching.
Provide simple handouts or digital guides that summarize key rules and scripts.
-
Onboard and certify staff.
Include last call training in new-hire orientation.
Require a brief quiz or sign-off to confirm understanding.
-
Audit and update regularly.
Conduct periodic spot-checks during last call.
Update training as laws change or new risks appear.
Consider pairing your internal program with external responsible beverage service courses.
These may be required or recognized by your jurisdiction and insurers.
Quick Best-Practice Checklist for Safer Last Call
Use this simple checklist during training:
• Clear, written last call time and policy
• One drink per guest at last call
• No doubles, pitchers, or heavy shots near closing
• Staff trained to spot and document intoxication
• Standard scripts for last call and refusals
• Coordinated roles for bartenders, servers, hosts/security, and managers
• Routine incident reports and record-keeping
• Regular refreshers and debriefs after incidents
• Management support for safe choices over short-term sales
FAQ About Last Call Training and Overserving Risk
Q1: What is last call training for bartenders and servers?
Last call training is a clear, step-by-step program that teaches staff to handle the final service safely. It covers timing, drink limits, signs of intoxication, refusal skills, and how to document incidents. This method lowers the risk of overserving.
Q2: How does responsible last call training reduce overserving and liability?
It reduces overserving by giving staff clear rules, tools to spot impairment, and ready scripts for refusing service. A team that follows a proven process and keeps good records protects both guests and the venue from legal trouble.
Q3: What should be included in a bar’s last call procedures and policies?
A bar’s policies should state the exact last call time, allowed drink types, and limits. They should explain how to announce last call, cut off intoxicated guests, arrange safe transit, and complete incident reports. These details must be part of the overall training so every team member follows them consistently.
A good last call program keeps you compliant and protects people.
It supports staff and builds a strong, responsible brand.
Treat last call as a key safety process.
That way, you lower overserving risk while still delivering a warm and profitable guest experience.