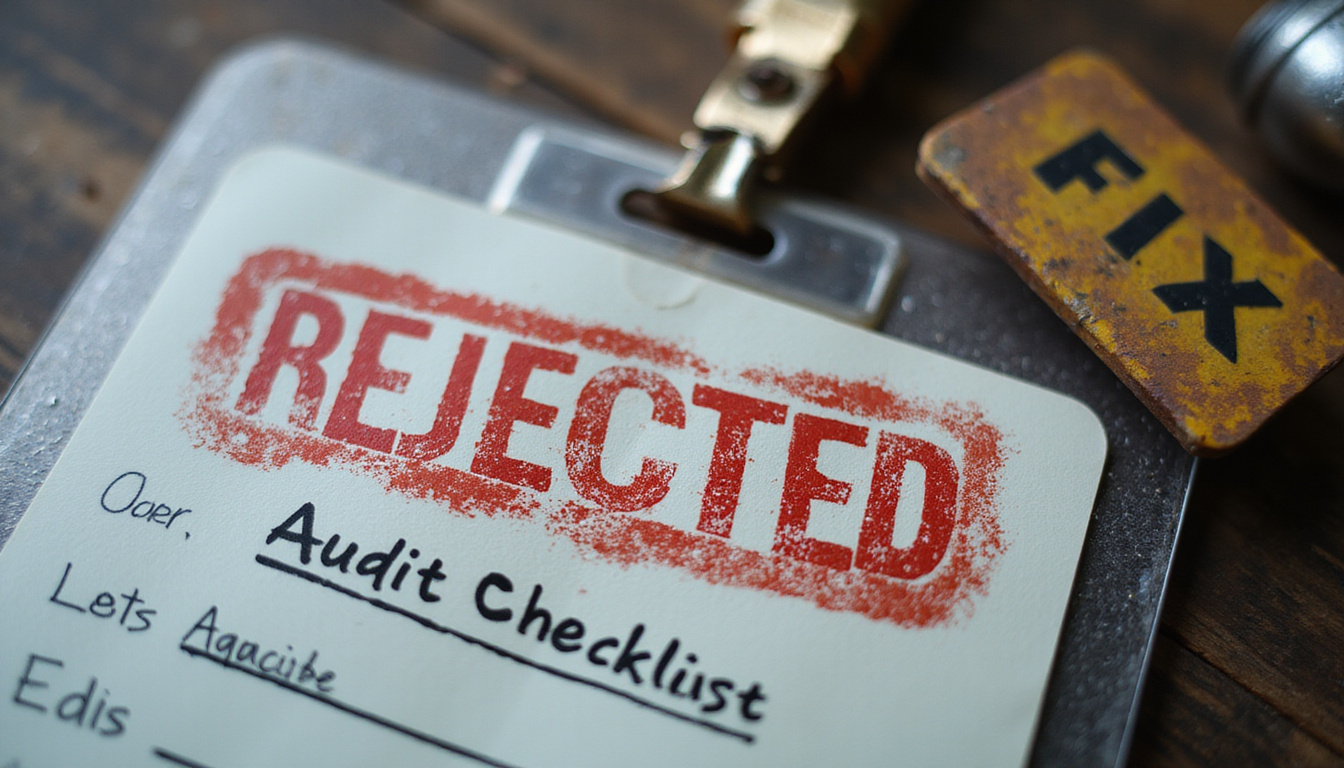
BLOG
ID compliance does more than fill a checklist in onboarding or sign-up. It acts as a core risk control. It guards fraud, meets legal rules, and builds customer trust. When businesses push ID compliance aside, they risk fines, legal trouble, and lasting harm to their names. In this guide, we list common ID compliance mistakes. We show how these errors erode your business. We offer fixes to stop them before they become threats.
What is ID compliance, really?
ID compliance covers the policies, processes, and tools you use to check identities. It covers customers, employees, vendors, and others. It meets legal, regulatory, and security needs.
Depending on your setting, ID compliance works by:
• Verifying government IDs like passports, national IDs, and driver’s licenses.
• Running Know Your Customer (KYC) and Customer Due Diligence (CDD) checks.
• Screening against sanctions, watchlists, and politically exposed person (PEP) lists.
• Checking activity and risk levels on an ongoing basis.
• Protecting personal data per laws like GDPR or CCPA.
Regulators in financial services, payments, crypto, and online markets now expect strong and auditable ID controls. They want these controls to match your risk.
Mistake #1: Treating ID compliance as a one-time event
Many see ID checks as a one-off at sign-up. Then they forget the task.
Why this sinks businesses:
• Risk profiles change. A customer may later appear on a sanctions list or become a PEP.
• Documents expire. Passports and IDs end their valid period and must be replaced.
• Regulations change. AML and KYC rules improve quickly, leaving old checks outdated.
Without ongoing checks, you risk dealing with sanctioned people, high-risk groups, or fake identities.
How to fix it:
• Monitor customers continually against sanctions and PEP lists.
• Set alerts for document expiry. Request updates before important actions.
• Review risk for high-risk customers often.
See ID compliance as lifecycle management, not just a front-door check.
Mistake #2: Over-reliance on manual checks
Manual checks feel safe because a human reviews each document. Yet manual-only checks invite risk.
The risks:
• Human error can miss subtle signs of forgery or deepfake fraud.
• Different reviewers might use various standards.
• As you grow, manual checks slow down onboarding or encourage rushed reviews.
• Manual decisions are hard to prove to regulators.
How to fix it:
• Use automated verification tools. These tools check documents with OCR, run biometric tests (selfie vs. ID), and detect fraud.
• Let humans step in only for tricky cases.
• Standardize reviews with checklists and clear rules.
• Log each decision, action, and change to build audit trails.
Automation does not replace smart judgment. It simply puts the right data closer together for your team.
Mistake #3: Ignoring jurisdictional differences
ID compliance does not fit all places the same way. Laws differ by country, state, or region.
Common issues:
• Using one universal KYC process without local tweaks.
• Missing age or product-specific rules for gambling, alcohol, or finance.
• Ignoring data location rules like storing EU citizens’ IDs outside allowed regions.
What is acceptable in one place may be illegal in another. The result can be regulator demands, blocked services, or fines.
How to fix it:
• Map out jurisdictions. List where users are and what rules apply.
• Branch your onboarding by geography. Use stricter rules locally if needed.
• Work with local legal and compliance experts.
• Track regulation changes so you can adjust quickly.
A flexible framework works better than one rigid global policy.
Mistake #4: Poor data protection around ID documents
Strong ID checks need strong data protection. The sensitive data you gather – scanned IDs, selfies, biometric data – must be safe.
Where businesses fail:
• Storing ID images in systems that lack security or control.
• Sending identity documents via email.
• Collecting more data than needed.
• Ignoring how long data should be kept per law.
A breach of ID data increases risks. It can invite fines, lawsuits, and long-term brand damage.
How to fix it:
• Store ID data in encrypted and access-controlled repositories.
• Stop sharing ID data via email, chat, or unapproved tools.
• Use data minimization: gather only what you need.
• Set and apply clear data retention and deletion policies as per GDPR, CCPA, or local laws.
This way, every connection among data points comes with extra security.
Mistake #5: Weak or non-existent risk-based approach
Some organizations check everyone the same way. This approach wastes resources and risks fraud.
Why it is a problem:
• Low-risk users suffer extra friction, which hurts conversion rates.
• High-risk users get weak checks that miss fraud and money laundering.
• Resources are wasted over reviewing users who pose little risk.
Regulators expect a risk-based approach (RBA). They want tougher checks for higher risk.
How to fix it:
• Define clear risk factors such as geography, transaction size, product type, industry, and structure.
• Set risk ratings: low, medium, and high.
• Tailor your controls:
- Low risk: use basic KYC checks.
- Medium risk: add enhanced checks and limited ongoing monitoring.
- High risk: use deep due diligence, check funds sources, and run continuous monitoring.
A clear, documented RBA shows regulators you know how to manage risks.
Mistake #6: No clear ownership or accountability
ID compliance can fall between IT, security, operations, and legal. Without clear ownership, gaps form.
Symptoms of unclear ownership:
• Teams may use different tools and standards.
• There is no single lead for regulators or auditors.
• Problems are fixed only when they become urgent.
• Policies, training, and documentation become scattered.
How to fix it:
• Appoint a clear owner for ID compliance (for example, Chief Compliance Officer or Head of Risk).
• Build a cross-team group with Legal, Product, Engineering, CX, and Security.
• Set up a clear governance framework. Explain who approves changes and who monitors performance.
• Use regular compliance reporting with clear metrics and incident reviews.
Clear ownership brings each connected task closer together.

Mistake #7: Inadequate staff training and awareness
Even a strong policy fails if the people using it do not understand what is at stake.
Common training gaps:
• New staff may not know how to spot fraud.
• Support teams may ignore escalation paths when they see warning signs.
• Product teams might miss regulatory constraints during design.
• Annual training may feel like a mere box check.
How to fix it:
• Offer role-based training, not one generic session. Tailor sessions for frontline, product, engineering, and leadership roles.
• Show real examples and case studies of ID compliance failures.
• Use scenario-based exercises to practice spotting and reporting suspicious actions.
• Track training and check understanding with quizzes or certifications.
When each word connects clearly, staff are your first strong link in defense.
Mistake #8: Failing to monitor vendors and third parties
If you outsource ID verification or KYC, regulators still hold you responsible.
Risks with third parties:
• Over-relying on vendor claims without checking error rates.
• Lacking clear service level agreements or audit rights.
• Poor integration that causes data leaks or inconsistent records.
• Vendors working under rules that differ from your local laws.
How to fix it:
• Do proper due diligence on vendors. Check certifications, references, regulatory experience, and data security.
• Set contractual obligations: SLAs, security rules, data processing agreements (DPAs), and audit rights.
• Review vendor performance regularly—watch for false positives, delays, or downtime.
• Prepare a backup plan in case a vendor fails or suffers a breach.
Each connection with a vendor must be secure and clear.
Mistake #9: Neglecting auditability and documentation
Regulators want proof that you did the right checks. They need to see a clear record.
What goes wrong:
• Decisions are not logged or tied to clear evidence.
• Policies and actions become outdated or inconsistent.
• Records, approvals, or risk assessments lack a central home.
• Retrieving historical data becomes difficult during an inquiry.
How to fix it:
• Keep one clear source for policies, SOPs, risk assessments, and approvals.
• Log every decision with timestamps, the user’s name, and the reason.
• Use case management tools for investigations and escalation.
• Run internal audits and mock regulator reviews to test readiness.
When each piece of evidence stays close to its check, you build a strong link for audit trails.
Mistake #10: Friction-heavy user experience that drives workaround behavior
An overly rigid ID compliance process does more than annoy users. It can push them toward unsafe workarounds.
Negative outcomes:
• Customers may abandon onboarding and go to a competitor.
• Employees might cut corners to speed up the process.
• Increased support tickets and manual interventions add compliance risk.
How to fix it:
• Design ID flows with clear user experience practices. Make the process mobile-friendly, explain steps clearly, and show progress.
• Use progressive verification. Ask for extra data only when risk or transaction size requires it.
• Give transparent explanations on why data is collected and how it is protected.
• Measure conversion rates, completion times, and drop-off points. Then, refine the process.
A strong ID check and a smooth user path reinforce each other when the steps connect closely.
A practical checklist to tighten your ID compliance
Use this list to find gaps and set fixes:
-
Governance & Ownership
• Assign a clear owner for ID compliance.
• Document policies, procedures, and a risk-based approach.
-
Technology & Automation
• Use automated checks for documents and biometrics.
• Monitor sanctions and PEP lists continuously.
-
Risk-Based Controls
• Set customer risk ratings (low/medium/high).
• Apply enhanced checks for higher risks.
-
Jurisdiction & Regulation
• Localize verification flows for key markets.
• Monitor regulatory changes actively.
-
Data Protection
• Store data in encrypted, access-controlled systems.
• Follow clear retention and deletion policies.
-
Vendors & Third Parties
• Do due diligence and set clear contracts with SLAs.
• Review vendor performance regularly.
-
Training & Culture
• Provide role-specific training with real examples.
• Set clear paths for escalation of suspicious activity.
-
Audit & Reporting
• Log every decision with clear audit trails.
• Run internal audits and report to leadership regularly.
When several areas show red flags, create a remediation plan with timelines, owners, and milestones.
Building ID compliance as a competitive advantage
Done well, ID compliance does more than defend. It also helps you:
• Onboard customers faster using smart automation and fewer manual checks.
• Enter new markets with processes that meet local rules.
• Win enterprise deals by showing strong compliance and security.
• Gain trust from partners, investors, and regulators.
The key is to build ID compliance into your product strategy, risk controls, and customer experience from the start.
FAQs about ID compliance
-
What are ID compliance best practices for small businesses?
For small businesses, focus on a trusted verification solution. Keep KYC policies clear and simple. Use a basic risk-based approach: stricter checks for large or unusual transactions. Secure any stored ID data. Even if you do not face heavy regulation, these steps cut fraud and build trust.
-
How do digital identity compliance requirements differ from traditional checks?
Digital checks use remote methods like selfies, liveness detection, and automated document scanning. They stress strong authentication, data security, and audit trails for online flows. Traditional checks relied on physical inspection and manual records. Regulators now guide digital ID compliance with rules on biometrics and online onboarding.
-
What is the difference between KYC and broader ID compliance?
KYC targets customer identification and verification in financial settings. Broader ID compliance covers KYC and checks for employees, vendors, beneficial owners, sanctions screening, ongoing monitoring, and privacy rules. In short, KYC is one key part. Comprehensive ID compliance covers the full identity lifecycle across your network.
By fixing these ID compliance mistakes early—before regulators, fraudsters, or customers force your hand—you build stronger, safer connections. In doing so, your risk control becomes a trusted foundation for growth.
BLOG
A responsible vendor audit now serves as a risk-control tool. It guards your brand, your customers, and your bottom line. Supply chains grow complex. Regulators push ESG, data protection, and third‑party risk. Businesses rely on vendors. They need a method to check their partners and how those partners work.
This guide gives you clear steps. It shows proven ways to build and improve your vendor audit program. You reduce supplier risk, not just file paperwork.
What is a responsible vendor audit?
A responsible vendor audit reviews supplier practices. It tests if they meet your set standards for:
- Legal and regulatory issues
- Information security and data privacy
- Financial stability and continuity
- Ethical behavior and human rights
- Environmental and social practices
- Operational performance and quality
This audit uses documentation review, data checks, and regular monitoring. It confirms a supplier meets today’s rules and shows if they are a secure long‑term partner.
Think of it as three-level due diligence:
- Pre‑contract – Can we start working with them?
- In‑life – Do they keep meeting duties and promises?
- Event‑driven – Has something changed that calls for a using closer check?
Why supplier risk is rising—fast
Trends now demand strong vendor audits:
- Regulatory pressure – Laws like GDPR, CCPA, HIPAA, and PCI DSS hold you responsible for your vendors’ actions.
- ESG and human rights rules – New EU laws and others push firms to watch environmental and social risks. (Source: OECD Due Diligence Guidance)
- Cyber and ransomware threats – Hackers target third parties as an easier entry point.
- Brand risk – A vendor scandal in forced labor, unsafe work, or corruption can hurt your brand.
- Operational fragility – Risk from concentration, political tension, or logistics problems can stop operations if a key vendor fails.
A strong audit process helps you spot these issues, react fast, and prove to regulators and customers that you manage third‑party risk well.
Core pillars of a strong responsible vendor audit program
Build your program on clear pillars:
- Governance and ownership
- Risk‑based vendor segmentation
- Standardized audit criteria
- Verification beyond self‑attestation
- Continuous monitoring and re‑assessment
- Remediation, offboarding, and exit strategies
Let’s see how these look in action.
1. Governance: Define who owns third‑party risk
A vendor audit fails fast if “everyone” owns it. You need clear accountability and decision rights.
Key steps include:
- Create a cross‑functional team – Bring together Procurement, Legal/Compliance, Information Security, Finance, and key business units.
- Appoint a clear owner – Choose a Third‑Party Risk Manager, Head of Vendor Management, or Compliance lead to drive the process.
- Document policies and standards – Write down when to audit, what is in scope (e.g. security, ESG, finance), and what happens with a failure.
- Set risk appetite and thresholds – Define which risks are acceptable, which need mitigation, and which are deal‑breakers.
Without a clear governance layer, audits become random, subjective, and unfair among suppliers.
2. Risk‑based vendor segmentation: Not all suppliers are equal
A key practice is proportionality. Focus more on suppliers that most affect your business.
Segment vendors by:
- Data sensitivity – Do they handle personal, financial, or health data?
- Business criticality – Would their failure stop your core work?
- Regulatory exposure – Are they involved in regulated industries?
- Geographic footprint – Do they operate in high‑risk areas?
- ESG profile – Do they work in sectors like mining, textiles, or heavy manufacturing?
Use typical tiers:
- Tier 1 (High Risk) – Core suppliers, data processors, cloud providers, manufacturers vital to your product.
- Tier 2 (Medium Risk) – Important but replaceable services with some data or operational exposure.
- Tier 3 (Low Risk) – Non‑critical vendors with little access to vital data or operations.
Map your audit depth and frequency to these tiers. Use in‑depth checks for Tier 1 and lighter reviews for Tier 3. —
3. Standardize your responsible vendor audit criteria
Keep your approach consistent. Build a common question and control framework. Tailor this framework by vendor type and risk level.
Key domains include:
A. Legal and regulatory compliance
- Licenses, certifications, and registrations
- Compliance with industry rules (e.g., FDA, ISO standards)
- Anti‑bribery and corruption controls (e.g., FCPA, UK Bribery Act)
- Sanctions, export controls, and trade checks
B. Information security and data privacy
- Security policies and governance
- Access controls, encryption, and vulnerability checks
- Incident response and breach procedures
- Data processing and sub‑processor agreements
- Privacy practices per laws (e.g., GDPR, CCPA)
C. Financial and operational resilience
- Financial statements and credit reports
- Insurance coverage (e.g., cyber, liability)
- Business continuity and disaster plans
- Supply chain backup and single‑point risk evaluations
D. Ethical conduct and human rights
- Codes of conduct and ethics training
- Labor practices (wages, hours, no child labor)
- Freedom of association and non‑discrimination
- Grievance systems for workers and communities
E. Environmental and social responsibility
- Environmental management and reports
- Emissions, waste, and resource data
- Community impact, land use, and indigenous rights
- Alignment with global standards (e.g., UN Global Compact, OECD Guidelines)
Use international standards to shape your checklist. This helps vendors know what is expected.
4. Verification: Go beyond checkboxes and self‑declarations
Many firms stop at self‑attested questionnaires. A solid audit validates vendor claims.
Techniques include:
- Reviewing document evidence – Check policies, logs, certifications (like ISO 27001, SOC 2), audit reports, and training records.
- Using third‑party audits – Trust credible external reports when you can.
- Conducting on‑site or virtual visits – For high‑risk vendors, visit the site or use video calls to see working conditions and controls.
- Sampling and testing – Review samples of logs, incident records, or HR files to verify practices.
- Consulting external data sources – Use credit checks, sanctions lists, adverse media, and ESG databases.
Your framework should set evidence levels per risk tier to avoid last‑minute improvisations.
5. Make audits continuous, not one‑off events
Vendor risk changes over time. Mergers, leadership shifts, legal issues, cyber attacks, or political events can alter risk fast.
Keep audit work ongoing with these steps:
- Set audit cycles by tier – For example, Tier 1 yearly, Tier 2 every two years, Tier 3 on renewals.
- Use continuous monitoring tools – Track cyber posture, news, sanctions, and litigation around your vendors.
- Trigger off‑cycle audits when needed – For example, after a breach, a fine, labor disputes, or changes in ownership or location.
- Review SLAs and KPIs – Include performance data like delivery times, defect rates, and uptime in your review.
This lifecycle view makes audits a key part of managing vendor relationships.
6. Remediation, offboarding, and exit: Plan for problems
An audit will find issues. Your response is as important as your findings.
Follow a clear plan:
-
Classify findings
- Critical (fix immediately or before contract begins)
- Major (fix within a set timeline)
- Minor (track for review in the next cycle)
-
Use Corrective Action Plans (CAPs)
- Work with the vendor to fix issues
- Set clear owners, deadlines, and evidence needs
- Monitor progress and act if deadlines slip
-
Decide consequences for non‑remediation
- Contract penalties
- Suspension of activities
- Reducing volumes or scope
- Full termination and replacement
-
Plan an orderly exit
- Set data return or destruction rules
- Offer support to move to a new supplier
- Have a clear internal and external communication plan
Acting on findings turns an audit from a paper process into real risk reduction.
Practical steps to launch or upgrade your program
If you start from scratch or want to improve an ad‑hoc process, follow these steps:
-
Map your vendor landscape
- List all third parties, including subcontractors.
- Note spend, contract owners, provided services, and data exposure.
-
Design a simple risk scoring model
- Use a short questionnaire to score vendors on data sensitivity, business impact, regulatory issues, and geography.
- Assign each vendor a risk tier.
-
Create tiered audit templates
- Build a core audit questionnaire.
- Simplify for low‑risk vendors and expand for high‑risk ones.
-
Pilot with a small group of key vendors
- Start with a few high‑impact suppliers.
- Gather feedback from vendors and team members to refine the process.
-
Automate where possible
- Use vendor management or third‑party risk platforms to share questionnaires, track evidence, and monitor progress.
- Link audit status to contract renewals.
-
Educate internal teams
- Train procurement and business teams on vendor audits.
- Provide guidelines for discussing requirements with suppliers in a friendly, clear manner.
Elements of an effective responsible vendor audit checklist
A strong checklist usually includes:
- Vendor profile and contact information
- Services in scope and data handled
- Legal and regulatory obligations
- Information security controls and certifications
- Privacy practices and sub‑processor details
- HR, labor, and health & safety policies
- Environmental management and reporting practices
- Anti‑corruption, sanctions, and ethics measures
- Financial statements and insurance details
- Business continuity and disaster recovery plans
- List of required evidence (documents, logs, reports)
- Overall risk rating and recommended actions
Keep this document live. Update it as regulations change and you learn from past audits.
Common mistakes to avoid in responsible vendor audits
When you build an audit program, avoid these pitfalls:
- Over‑complexity – Do not use long questionnaires that yield poor answers.
- One‑size‑fits‑all – Avoid deep audits for every vendor; focus on high‑risk suppliers.
- No feedback loop – Collect data but do not let it shape risk ratings or procurement choices.
- Poor internal alignment – Ensure Procurement, Security, and Legal work together instead of sending conflicting requests.
- Ignoring subcontractors – Check both direct vendors and their critical third parties.
- Lack of transparency – Do not surprise vendors with heavy audit demands without clear expectations, timelines, or benefits.
Design your framework with ease of use for your teams and suppliers.
How to turn audits into stronger vendor relationships
A vendor audit need not be adversarial. When done well, it can improve cooperation and performance:
- Share context – Tell vendors that the audit is a mutual risk management tool and meets regulatory demands.
- Provide templates and examples – Show them what strong evidence looks like.
- Offer support for smaller vendors – Give guidance to SMEs so they can be strong partners.
- Recognize strong performers – Reward vendors with preferred status or lower audit frequency for good results.
- Collaborate on improvement – Use audit findings to jointly create improvement roadmaps in ESG and security areas.
This collaborative approach makes vendors more willing to invest time and share details during an audit.
FAQ: responsible vendor audit and supplier risk
1. What is included in a responsible supplier audit?
A responsible supplier audit (or responsible vendor audit) checks compliance, security, financial health, and ESG performance. It reviews policies, procedures, and evidence like certifications, training records, and incident logs to see if the vendor meets your standards and legal duties.
2. How often should I perform a responsible vendor risk assessment?
It depends on risk tier. High‑risk vendors are often audited yearly with continuous monitoring. Medium‑risk vendors may be checked every one to two years. Low‑risk vendors are generally reviewed on contract renewal or when material changes occur.
3. Do small businesses need a formal responsible vendor auditing process?
Yes. Even small firms benefit from a streamlined process. You can keep the framework simple but still check that key suppliers handle data well, remain financially stable, and follow relevant laws. A basic, risk‑based audit helps you grow safely.
By building a clear, risk‑based vendor audit program and acting on your findings, you can cut supplier risk, meet regulatory demands, and protect your organization from reputational, operational, and ethical harm.
BLOG
If your facility holds environmental, safety, or building permits, you must provide permit holder training. Training stands as your first defense. It stops violations, prevents shutdowns, and limits fines. Regulators now expect proof that employees know their permits and follow their rules every day.
This guide explains how to build and run a strong permit holder training program. With this program, you can pass inspections and avoid extra penalties.
Why permit holder training matters more than ever
Air emission, wastewater, hazardous waste, fire, or safety permits come with many rules. Not following these rules can cause:
• Big fines and penalties
• Corrective actions and extra inspections
• Operational stoppages or full shutdowns
• Damage to your reputation and customer trust
• Civil or criminal liability for serious issues
Agencies like the U.S. EPA and OSHA often list poor training as a main reason for non-compliance (source: EPA Compliance Monitoring). For this reason, permit holder training must be accurate, meaningful, and properly used.
Step 1: Know your permits inside and out
Before training permit holders, you must know what each permit requires.
Inventory all applicable permits
Begin with a full list. For example, gather:
• Air permits (e.g., Title V, minor source permits)
• Wastewater or industrial pretreatment permits
• Stormwater permits (e.g., construction or industrial)
• Hazardous waste generator permits
• Fire, building, and occupancy permits
• Operating permits like hot work or confined space
• Special licenses (e.g., pressure vessel, boiler, radiation, elevators)
For each permit, note down:
• Permit number and issuing authority
• Effective and expiration dates
• Who or which unit is affected
• Key conditions, monitoring, and reporting steps
Translate legal language into operational rules
Most permits serve regulators, not operators. Good training turns legal terms into clear actions:
• What must an operator do or avoid?
• When must activities stop?
• Who must record what, when, and how?
• What triggers a report or notification?
Write a short “operator summary” for every permit. This summary becomes the backbone of your training program.
Step 2: Define who needs permit holder training (and why)
Not all roles need the same training level. Mapping roles to permit duties is vital.
Identify key roles
Common roles include:
• Primary permit holder/responsible official – the named person on the permit who is accountable.
• Supervisors and managers – they check daily operations and ensure compliance.
• Operators and technicians – they run equipment, record data, and inspect systems.
• Maintenance personnel – they can affect emissions, discharges, and safety setups.
• EHS/compliance staff – they run programs, reports, and audits.
• Contractors and temporary workers – they may work on covered activities.
Tailor training depth by role
For each role, decide:
• Must-know requirements – things that cause immediate risk if wrong.
• Should-know requirements – important for steady performance.
• Nice-to-know context – helps them understand rule reasons.
For example, a wastewater permit holder might learn permit limits, sampling methods, and report dates. An operator may only need alarm levels, logging instructions, and contact info in case of issues.
Step 3: Build a structured permit holder training program
A strong training program must include key parts.
Core elements to cover
Every permit type should share these ideas:
-
Purpose and scope of the permit
• Explain why the permit exists and what it covers.
• Discuss what happens if rules are broken.
-
Key permit conditions
• Discuss operating limits like flow, pressure, temperature, volume, or hours.
• List prohibited activities.
• Explain maintenance, inspections, and testing steps.
-
Monitoring and recordkeeping
• Detail what data to collect (e.g., readings, logs, inspection checklists).
• Explain how often to measure and which methods to use.
• Describe how and where records are stored.
-
Reporting and notifications
• Set clear reporting schedules (monthly, quarterly, annually).
• Explain what counts as a reportable deviation.
• List who must be notified, when, and how.
-
Standard operating procedures (SOPs)
• Create step‑by‑step procedures that match permit conditions.
• Include startup, shutdown, and upset steps.
• List emergency procedures for permit issues.
-
Inspection preparation and expectations
• Show what inspectors ask for.
• Describe how employees should talk with inspectors.
• Explain how to quickly find and share documentation.
Use plain language and real examples
Make training useful by:
• Replacing jargon with clear words.
• Showing photos of your actual equipment, panels, and logs.
• Reviewing near-misses or past incidents (without naming anyone).
• Pointing out examples of good versus poor documentation.
Step 4: Choose effective training formats
People learn in different ways. Regulators care more about results than the format. Mixing methods can boost learning.
Common delivery methods
• Classroom or virtual instructor-led sessions
These work when new permits or big changes happen, and they allow for Q&A.
• On-the-job, task-based training
A supervisor shows an operator how to handle real equipment and tasks.
• Microlearning modules
Short online lessons (5–10 minutes) focus on one topic, like “How to fill out a daily emissions log.”
• Job aids and quick-reference guides
They come as laminated cards, checklists, or flow charts placed near control panels.
• Drills and simulations
Employees practice responses to alarms, system upsets, or permit breaches.
Verify comprehension
Determine that staff understand the training by:
• Using short quizzes on critical permit points
• Requiring practical demonstrations such as recording readings
• Having experienced permit holders sign off on trainees
• Documenting supervisor observations with checklists
These steps prove due diligence during inspections.
Step 5: Make training ongoing, not one-and-done
Site conditions and regulations change. One training session at hire or permit issuance is not enough.
Establish a training cadence
Plan for:
• Initial training – as new hires or roles start, or when new permits are issued.
• Refresher training – yearly or semi-annually based on risk and rules.
• Change-based training – when permits, equipment, or processes change.
• Post-incident training – after deviations, incidents, or near-misses.
Link your permit holder training schedule to your wider EHS or compliance calendar to avoid missing dates.
Track completion and status
Use a simple chart with:
• Rows: employee names/roles
• Columns: permits or topics
• Cells: dates of completion, upcoming refresher dates, and competency status
Whether you use an LMS or a spreadsheet, make the chart simple. Ensure that gaps are easy to find, expiring sessions trigger reminders, and records are searchable during inspections.
Step 6: Align permit holder training with inspections
Good training makes inspections easier.
Understand inspection focus areas
Think about:
• The top five things an inspector might ask for each permit
• Documents that are always requested
• Past conditions that led to violations
Design training to tackle these points. Teach your staff:
• How to find and share permits, logs, and reports
• How to answer “How is this requirement met?” accurately
• How to get help if they cannot answer
Train staff on inspection behavior
A smooth inspection can reduce pressure. Teach these basics:
• Who speaks for the company
• How to answer questions with honesty and brevity
• What to avoid: guessing, arguing, or hiding facts
• How to document inspector requests and follow up
Role-play short inspection scenarios. Practice helps prevent surprises.
Step 7: Use training to proactively prevent costly fines
Good permit holder training stops violations before they happen.
Address common causes of violations
Many fines come from:
• Incomplete or wrong records
• Missed inspections, tests, or maintenance
• Unrecognized changes in operations that need permit review
• Weak communication among operations, engineering, and EHS
• No clear accountability for permit rules
Your training should:
• Stress the need for accurate and timely documentation
• Clarify who is responsible for each rule
• Show how to spot changes that may affect permits
• Provide easy channels for raising questions or concerns
Embed “see something, say something”
Encourage staff to speak up if they see that:
• They do not understand a requirement
• Logs or reports show mistakes
• Equipment does not operate normally
• New processes or materials are introduced
Early reporting and self-disclosure can greatly reduce or even stop fines.
Step 8: Document everything to prove training and compliance
Regulators ask, “Do your employees know what to do?” and “Can you prove you trained them?”
Keep clear records. For each permit holder, track:
• Training dates and topics
• Materials used (slides, handouts, SOPs)
• Attendance sheets or online completion records
• Quiz or test scores, when used
• Competency sign-offs from supervisors
Well-organized records show a strong compliance culture. They can even affect enforcement decisions during inspections.
Step 9: Continuously improve your permit holder training
Always look to make your training better through feedback.
• Review inspection reports and audit findings for common issues
• Ask operators where instructions feel unclear or unworkable
• Update training when SOPs, equipment, or regulations change
• Remove old content that no longer applies
At least once a year, review the full permit holder training program to ensure it fits your permits and operations.
A sample checklist for permit holder training
When you design or audit your program, check that you:
- Identified all applicable permits and summarized their key rules.
- Mapped each permit to the proper roles and duties.
- Developed content that fits every role.
- Chose training methods that suit your workforce.
- Built in comprehension checks like quizzes and demonstrations.
- Planned initial, refresher, and change-based trainings.
- Included inspection preparedness in the curriculum.
- Set up a strong system for tracking training records.
- Gathered feedback and have a plan for continuous improvement.
A checklist like this ensures your permit holder training meets real compliance needs.
FAQs about permit holder training
1. How often should permit holders be trained on permit requirements?
How often depends on the rules, risk, and company policy. Many firms offer initial permit holder training as soon as someone takes on this role. They then run annual refreshers. Extra training is wise when permits change, equipment is upgraded, or after a major incident, audit, or inspection.
2. What should be included in environmental permit holder training specifically?
For permits on air, water, waste, or stormwater, training must cover permit limits, monitoring and sampling needs, recordkeeping, incident reporting, related SOPs, emergency steps, and inspection tips. Effective environmental permit holder training hones in on day‑to‑day tasks—what to measure, how often, how to log, and when to escalate.
3. How can we prove our permit holder training program is effective to regulators?
Regulators want both documentation and results. Keep detailed records of all training (topics, dates, attendees, quizzes, sign-offs). Show that trained staff follow permit rules correctly. Low violation rates, quick corrective actions, and clear evidence of improvement all help prove your permit compliance training is strong.
A careful and clear permit holder training program turns complex rules into clear actions on the shop floor. When every employee understands their role in compliance—and can prove it—inspections become routine, fines become rare, and your operation runs safely and smoothly.
BLOG
Understanding licensee responsibilities is vital. They lie at the heart of running a trustworthy, resilient, and compliant business. Whether you run a restaurant with a liquor license, a software company using third‑party IP, or a regulated financial service, you must follow both the law and industry standards. Your obligations come from contracts and legal rules.
This guide shows the compliance steps every business must take. It covers common pitfalls and offers practical tips to stay in step with regulators and licensors.
What Are Licensee Responsibilities?
A licensee is a person or business granted permission to use another’s property. That property may include:
- Intellectual property (like software, brand names, or patents)
- Regulated activities (such as selling alcohol, offering financial services, or providing healthcare)
- Real property or facilities
- Data and digital content
When you accept a license, you also accept its responsibilities. These obligations come from:
- The license agreement or contract
- Relevant laws and regulations
- Industry codes of conduct
- Your own internal policies
If you do not follow these rules, you may face fines, lose your license, risk lawsuits, or suffer harm to your reputation.
Core Legal and Regulatory Duties of a Licensee
Almost all licensees share a set of basic duties, even if details differ by sector.
1. Comply with Laws, Regulations, and License Conditions
Your first task is to understand and follow:
- The terms and conditions of your license
- All relevant laws and regulations in your area
- Any guidance from regulators or licensors
For example:
- A liquor licensee must check age and follow sale-hour rules.
- A financial services licensee must meet capital and reporting rules.
- A software licensee must respect use limits, user caps, and territory boundaries.
Regulators post rules and advice on their websites. For instance, the U.S. Federal Trade Commission posts trade practices rules (source: https://www.ftc.gov). Check these sites often and subscribe to updates.
2. Use the License Only as Authorized
License rights are not without limits. A typical license spells out:
- Scope of use (what you may do)
- Territory (where you may do it)
- Duration (how long you may use it)
- Exclusivity (if others might use it too)
- Transferability (if you can assign or sub-license it)
Your duty is to remain within the allowed limits. For instance:
- Do not use a “single-site” software license on more than one site.
- Do not sell outside the allowed territory.
- Do not use a trademark beyond agreed channels.
Internal audits can help you detect scope creep before it becomes a violation.
3. Pay Fees, Royalties, and Reporting on Time
Most licenses require payment. Payments might take the form of:
- Fixed fees
- Usage-based fees
- Royalties (a percentage of revenue or profit)
- Renewal fees and other charges
You must:
- Track payment obligations and due dates
- Keep clear records of sales or usage
- Submit royalty reports with proper documentation
- Support audits when needed
Late payments or bad records can trigger fines, extra interest, audit costs, or even a lost license.
Operational Responsibilities: Embedding Compliance Daily
Apart from legal duties, you need to manage how the license runs in daily work.
4. Implement Robust Internal Controls
Controls keep your team from accidentally breaking the license rules. Depending on your business, you may need:
- Access controls to limit who uses licensed software or data.
- Approval workflows to check the use of licensed brands or IP.
- Change management to prevent unapproved use when systems change.
Write these controls in policies. Review them each year or when licenses change.
5. Train Staff on Licensee Responsibilities
A license no one reads is a risk. Training should:
- Explain what the license covers and does not
- Identify forbidden uses and warning signs
- Use real examples from your work
- Tell staff whom to ask if they have doubts (such as Legal or Compliance)
Offer training when:
- A new staff member joins
- Roles change
- The license is renewed or changed
- A compliance incident occurs
6. Protect the Licensor’s Intellectual Property and Reputation
You must protect the licensor’s brand, content, or technology. This duty means you should:
- Use trademarks exactly as allowed (with specified logos, colors, sizes, and disclaimers)
- Avoid actions that hurt the brand’s reputation
- Report any suspected infringement by others
- Keep proprietary information secret
If you are a franchisee, you must also maintain brand standards for décor, service, and product quality. Failing to do so can harm the entire brand.
Risk Management and Data Protection Obligations
Modern licenses often involve digital systems and data. This adds extra duties.
7. Safeguard Data and Ensure Privacy Compliance
Handle customer data or proprietary datasets correctly. You are responsible for:
- Following privacy laws (like GDPR, CCPA, or PDPA)
- Putting in place data security measures such as encryption, access control, and backups
- Using data only as allowed
- Meeting legal requirements for data transfers, especially across borders
In addition, you may need to:
- Sign data processing agreements with licensors or third parties
- Do data protection impact assessments for high-risk processing
- Keep breach notification procedures ready
8. Manage Cybersecurity and System Integrity
For tech licensees (like SaaS, APIs, or on‑prem software), duties include:
- Keeping systems patched and updated
- Following secure configuration guidelines
- Preventing unauthorized access, sharing, or reverse‑engineering
- Avoiding the introduction of malware or vulnerabilities
Cyber incidents can quickly lead to a breach of license terms.
Monitoring, Documentation, and Communication Duties
Compliance is continuous, not a one‑time task.
9. Monitor Compliance and Conduct Periodic Reviews
Establish a routine to check compliance. This process can include:
- Regular internal checks against license rules
- Reviewing usage logs and access controls
- Sampling records for royalty calculations
- Spot‑checking marketing materials for correct brand use
For high‑risk licenses, consider an annual internal audit or even an external review.
10. Maintain Thorough Records
Good records back up daily operations and future reviews. You should keep:
- Signed license agreements and any changes
- Correspondence with licensors and regulators
- Training records and policy documents
- Usage logs, sales records, and reports
- Evidence of audits, risk assessments, and corrective steps
Many licenses require keeping records for a set time (for example, 5–7 years). Align your document policies with these rules.
11. Communicate Transparently with Licensors and Regulators
Clear communication stops small issues from growing. Common duties include:
- Informing the licensor or regulator about:
- Material changes in ownership or control
- Big changes in operations (like new product launches or expansion)
- Security incidents or data breaches linked to the license
- Asking for consent before:
- Assigning the license
- Sub‑licensing rights
- Using the license in new ways outside the original scope
When issues arise, sharing details early and having a plan can lessen the impact.
Consequences of Ignoring Licensee Responsibilities
If you do not meet your obligations, you face serious risks:
- Financial penalties such as fines, damages, and extra charges
- Termination or suspension of your license
- Regulatory enforcement through orders or even criminal charges in severe cases
- Reputational damage from loss of trust by customers, partners, or investors
- Operational disruption through forced changes or interruptions
In disputes, courts check if you took reasonable steps to comply. Documented policies, training, reviews, and prompt actions all help your case.
Practical Checklist: Key Licensee Responsibilities in Everyday Business
Use this checklist to quickly review your license management:
-
Understand the license
- Read the entire agreement and all exhibits
- Note the scope, territory, term, and transferability
- Check fees, reporting, and audit rights
-
Map obligations to your operations
- Identify which teams or processes are involved
- Appoint internal owners for key tasks
-
Implement controls and policies
- Define who can use what, where, and how
- Set up systems to enforce limits
- Create approval workflows for using IP or brands
-
Train relevant staff
- Explain the do’s and don’ts clearly
- Show role-specific examples
- Refresh the training often
-
Manage data and security
- Follow privacy laws carefully
- Use strong cybersecurity practices
- Sign any needed data processing or confidentiality agreements
-
Monitor and document
- Schedule regular compliance reviews
- Keep clear records of usage, reports, and payments
- Track and fix issues immediately
-
Engage with licensors and regulators
- Inform them of planned changes ahead of time
- Ask for clarification on unclear terms
- Notify them quickly if any incidents occur
Sector-Specific Nuances in Licensee Responsibilities
The core ideas are the same, but each sector adds specific duties.
Intellectual Property and Software Licensing
- Stick to user counts and device limits
- Control copying, modifying, or sharing software
- Only use licensed fonts, images, and media as allowed
- Respect open‑source license terms when building products
Franchising and Brand Licensing
- Follow the brand standards manual closely
- Join required marketing programs
- Report sales accurately for royalties
- Allow inspections and mystery shopping when needed
Regulated Industries (Finance, Healthcare, Alcohol, etc.)
- Meet “fit and proper” standards for owners and managers
- File regular regulatory returns and reports
- Maintain set capital, insurance, or safety standards
- Cooperate with inspections and investigations
In every case, licensee responsibilities extend well beyond the written contract. They cover a broad framework of regulatory and operational expectations.
How to Build a Culture that Supports License Compliance
Real compliance grows from a strong culture. Improve your approach by:
- Leadership commitment – Senior management treats licenses as key strategic tools, not just papers.
- Clear accountability – Name a person for each license and its duties.
- Openness about mistakes – Encourage staff to share concerns early.
- Continuous learning – Stay updated on legal changes, industry trends, and licensor needs.
When people know why these responsibilities matter—to protect customers, partners, and the business—they are more likely to follow the rules.
FAQs About Licensee Responsibilities and Compliance
1. What are the main licensee responsibilities in a commercial contract?
In most contracts, a licensee must:
- Use the licensed rights only within the allowed scope
- Pay all fees and royalties on time
- Protect the licensor’s intellectual property and confidential details
- Comply with applicable laws and rules
- Allow audits or inspections as agreed
- Avoid transferring or sub‑licensing without consent
Reviewing the contract and mapping its obligations into your policies is key.
2. How can businesses ensure they meet all licensing responsibilities?
Businesses can meet responsibilities by:
- Keeping a central list of all licenses and key terms
- Involving legal and compliance teams early in discussions
- Using access controls and monitoring around licensed assets
- Training staff on what is and is not allowed
- Conducting regular internal audits of usage and reports
- Speaking with licensors quickly if issues change
A proactive approach helps prevent accidental non‑compliance.
3. What happens if a company breaches its responsibilities as a licensee?
If you breach your responsibilities, you may experience:
- Formal notices demanding fixes
- Financial penalties like back payments and damages
- Suspension or termination of the license
- Regulatory actions or investigations in regulated sectors
- Court proceedings for infringement or contract breach
Often, early detection, open communication, and a solid remediation plan can lessen the damage. However, repeated or serious breaches can harm business relationships and your reputation permanently.
By knowing and actively managing your licensee responsibilities, you can turn licenses from potential liabilities into strategic tools. This, in turn, supports growth, fosters innovation, and builds trust.
BLOG
Choosing an Alexandria responsible vendor matters. Businesses, organizations, and residents who care about quality, ethics, and community impact must choose wisely. You source food, office supplies, construction services, or event vendors. The suppliers you choose affect your reputation, risk exposure, and bottom line.
This guide shows what “responsible vendor” means in Alexandria. It explains why you should include it in your buying strategy. It also tells you how to check and choose trusted local suppliers.
What Does an Alexandria Responsible Vendor Mean?
In Alexandria, a responsible vendor is a supplier that acts right and follows the rules. It:
- Operates legally and transparently.
- Respects safety, labor, and environmental rules.
- Treats employees and customers fairly.
- Provides solid quality at a fair price.
- Gives back to the Alexandria community.
For public contracts, “responsible” means a vendor must be both capable and compliant. It must also be responsive and meet all bid rules. Private vendors are measured by the same ideas.
Why Choosing Responsible Local Suppliers Matters
Choosing a local responsible vendor in Alexandria goes beyond just checking boxes. It gives you real, measurable benefits.
1. Reduced Risk and Greater Compliance
An irresponsible supplier can cause problems. They may cause:
- Legal or regulatory issues.
- Safety accidents and liability.
- Supply chain disruptions.
- Reputation damage.
Responsible vendors have strong controls. They use clear policies and follow all regulations. For example, if you buy food or catering, safe handling, inspections, and proper licenses protect your customers and your business.
2. Quality and Reliability
Good vendors do more than just promise. They:
- Deliver products and services on time.
- Meet agreed quality standards.
- Inform you about delays or issues.
- Stand behind their work with warranties or guarantees.
This reliability saves you hidden costs such as emergency orders, rework, or customer complaints.
3. Local Economic and Social Impact
Choosing an Alexandria responsible vendor can help locally. It will:
- Support local jobs and small businesses.
- Keep money in the local economy.
- Encourage sustainable practices and community programs.
Research shows local buying makes communities stronger. (source: U.S. Small Business Administration).
Core Criteria for Evaluating Responsible Vendors in Alexandria
Before you sign a contract, check vendors with clear, concrete rules. You do not need a huge procurement team—just a clear plan.
1. Legal, Licensing, and Regulatory Compliance
Begin with the basics:
- Business registration: Are they registered in Alexandria and Virginia?
- Licenses and permits: Do they have the required licenses (e.g. contractor licenses, health permits, professional certifications)?
- Insurance: Do they carry enough general liability, workers’ compensation, or other needed insurance?
- Regulatory record: Look for serious or repeated violations, fines, or unresolved complaints.
Check local government databases and public records to be sure.
2. Financial Stability
You want a vendor who will last. Look for signs of stability:
- How many years they have been in business.
- A steady growth path.
- Good references from similar clients.
- No history of unpaid liens, lawsuits, or bankruptcies.
- For larger contracts, they may share financial statements or a bank letter.
Stability is not only for big companies. It shows they can deliver what they promise.
3. Quality Management and Standards
A responsible vendor must prove their quality. Look for:
- Documented processes for quality control and inspection.
- Certifications like ISO or other industry marks.
- Product details: clear material lists, tolerances, and performance measures.
- Testing or samples: You might ask for samples or trial periods very often.
Ask how they fix mistakes or handle complaints. Look for proof instead of vague words.
4. Environmental and Social Responsibility
Your vendor should share your values. Check if they:
- Use recycling, waste reduction, and energy-efficient practices.
- Pay fair wages, keep safe work conditions, and follow labor laws.
- Hire locally, offer internships, work with charities, or take part in Alexandria programs.
You do not need perfection. Look for real actions and facts.
5. Ethics, Transparency, and Business Integrity
A good vendor works with honesty. Check if they:
- Have a written code of conduct or ethics policies.
- Set clear rules on conflicts of interest and gifts.
- Offer transparent pricing and contract terms.
- Communicate clearly about risks, limits, or delays.
- Have a record of keeping their promises.
Notice how they negotiate. Are they clear on what is included, what is not, and what might affect the price?
6. Health, Safety, and Risk Management
For sectors like construction and food service, safety is key. Ask them:
- Do they have written safety policies and training programs?
- What is their record for incidents or accidents?
- Do they use protective gear and safe work practices?
- Do they follow OSHA and local safety rules?
- Do they have an emergency response plan?
A vendor who takes safety seriously cuts your risk of accidents, lawsuits, and delays.
How to Identify Potential Alexandria Responsible Vendors
Finding the right supplier is easier when you know where to look.
1. Use Local Directories and Business Networks
Start your search using these tools:
- Alexandria Chamber of Commerce member directories.
- Local small business or minority/women-owned business lists.
- Local industry associations.
- City or county procurement portals with pre-qualified vendors.
Many of these sites already check basic requirements.
2. Ask for Referrals
Your trusted peers can guide you. Seek referrals from:
- Other local businesses or nonprofits.
- Property managers, event planners, or trusted contractors.
- Professional networks in your field.
Ask about reliability, communication, and how they solve problems.
3. Leverage Online Reviews and Public Records
Online reviews can show trends. Look at:
- Patterns in reviews instead of one-off comments.
- How the vendor responds to negative feedback.
- News, legal filings, or regulatory actions on the vendor.
Use these checks along with your other reviews.
A Step-by-Step Process for Selecting a Trusted Local Supplier
Turn the idea of an Alexandria responsible vendor into a step-by-step plan:
-
Define your needs clearly
List the work scope, quantities, quality levels, deadlines, budget, and any needed certifications.
-
Create a short list
Use directories, referrals, and research to list 3–6 vendors that fit.
-
Issue a simple RFP or RFQ
Even for small orders, ask for pricing, timelines, references, sample contracts, and certifications.
-
Evaluate on multiple dimensions
Do not choose on price alone. Rate vendors on quality, reliability, compliance, value fit, and overall cost.
-
Check references and verification sources
Call references and ask focused questions about performance and issues.
-
Conduct a brief interview or site visit
For key vendors, visit their site or hold a video call. See their operations and culture.
-
Pilot the relationship
Start with a small order or short-term deal. Review performance before a long-term contract.
-
Formalize expectations in writing
Write clear contracts or service-level agreements (SLAs) with deliverables, quality standards, deadlines, and remedies.
Key Questions to Ask an Alexandria Responsible Vendor
Use these questions in your RFPs, interviews, or meetings:
- How long have you operated in Alexandria or nearby areas?
- What licenses, permits, and insurance do you have?
- Can you explain your quality control process from order to delivery?
- What environmental or sustainability practices do you use?
- How do you keep labor practices fair and safe?
- Can you share local community projects you support?
- How do you handle delays, supply issues, or unexpected challenges?
- What are your standard payment terms?
- Can you offer references from similar clients in Alexandria or Northern Virginia?
- What makes you different from other local vendors in terms of responsibility and reliability?
Their answers and willingness to answer show if they match your expectations.
Balancing Cost with Responsibility
Price matters, but the cheapest option is not always best. When you compare Alexandria responsible vendors:
- Look at total cost of ownership. Consider maintenance, returns, delays, customer complaints, and overhead.
- Think about risk-adjusted cost. Ask: What will it cost if the supplier fails or causes a compliance issue?
- Weigh reputational impact. A responsible vendor can add value through a trusted image.
- See where a higher price brings benefits like strong warranties, better support, or clear ethical practices.
The goal is to get the best value, not just the lowest price.
Maintaining a Strong Relationship with Responsible Suppliers
When you choose an Alexandria responsible vendor, treat it as a true partnership.
- Communicate regularly: Share forecasts, upcoming projects, and feedback.
- Monitor key metrics: Track on-time delivery, quality, responsiveness, and customer satisfaction.
- Review periodically: Hold annual or semi-annual reviews, even with small suppliers.
- Reward good performance: Renew contracts, expand the project, or offer referrals.
- Address issues quickly: Raise concerns early and work together to resolve them.
Strong relationships help your vendor better understand your needs. They also result in better pricing, service, and joint problem-solving.
Red Flags: When a Vendor May Not Be Truly Responsible
Watch for signs that a vendor may not meet responsible standards:
- They hesitate or refuse to show licenses, insurance, or references.
- Their answers about safety, quality, or labor are vague or inconsistent.
- They have a history of unresolved complaints or legal disputes.
- Their contracts are overly complex or hide fees.
- They seem ready to break rules to cut costs or speed up delivery.
- Their extremely low prices may not be sustainable.
If you see several red flags, invest more time to find another Alexandria responsible vendor—even if this delays your project slightly.
Practical Checklist for Choosing an Alexandria Responsible Vendor
Use this checklist for a new local supplier:
- [ ] Registered business in Alexandria or Virginia.
- [ ] Licenses and permits are verified.
- [ ] Adequate insurance coverage is confirmed.
- [ ] No major unresolved legal or regulatory issues.
- [ ] Positive references from similar clients.
- [ ] A clear and documented quality control process.
- [ ] Evidence of environmental and social responsibility.
- [ ] Written policies on ethics and safety.
- [ ] Transparent pricing and fair contract terms.
- [ ] Responsive communication and openness.
- [ ] A successful pilot project or trial.
If a vendor meets most or all of these points, they are a strong candidate for a long-term relationship.
FAQ: Alexandria Responsible Vendor and Local Supplier Selection
-
What makes a vendor a “responsible supplier” in Alexandria?
A responsible supplier in Alexandria operates legally, follows all rules, and keeps high quality and safety standards. They treat workers fairly, protect customer interests, and work honestly. They also work to support the local community and environment, not just profit.
-
How can small businesses find ethical local vendors in Alexandria?
Small businesses can use Chamber of Commerce directories, ask for referrals, check online reviews, and request documents like licenses, insurance, and policies. Look for words like “responsible vendor” or “sustainable supplier” on websites. Ask about labor, environmental, and safety practices before signing a deal.
-
Are responsible vendors in Alexandria more expensive than others?
Not always. Some responsible vendors may cost a bit more. Their higher quality can lead to lower rework, fewer delays, reduced legal risks, and higher customer satisfaction. Often, the benefits outweigh a small extra cost.
By following these guidelines, you can choose an Alexandria responsible vendor. This decision will meet your high standards, support the local community, and help your organization succeed over the long term.